So in typical holiday-obsessed fashion, I completely decked the halls all day Sunday. It may have been 80 degrees outside but our house is twinkling, glittery, and smells like “Sparkling Snow” 24-7. I love it! I don’t really think I have any corners or wall space left for more Christmas DIYs, but I just had to find a spot for this one. I’ve been wanting to make this glitter deer head canvas the first time I saw it on Pinterest. I wanted to change it up just a little bit so I added some thick black stripes to the background. I love how it turned out, and from a crafting difficultly level I would rank it a 6 out of 10. Which basically means….TRY IT! Here is a simple tutorial on what you will need and how I made mine.
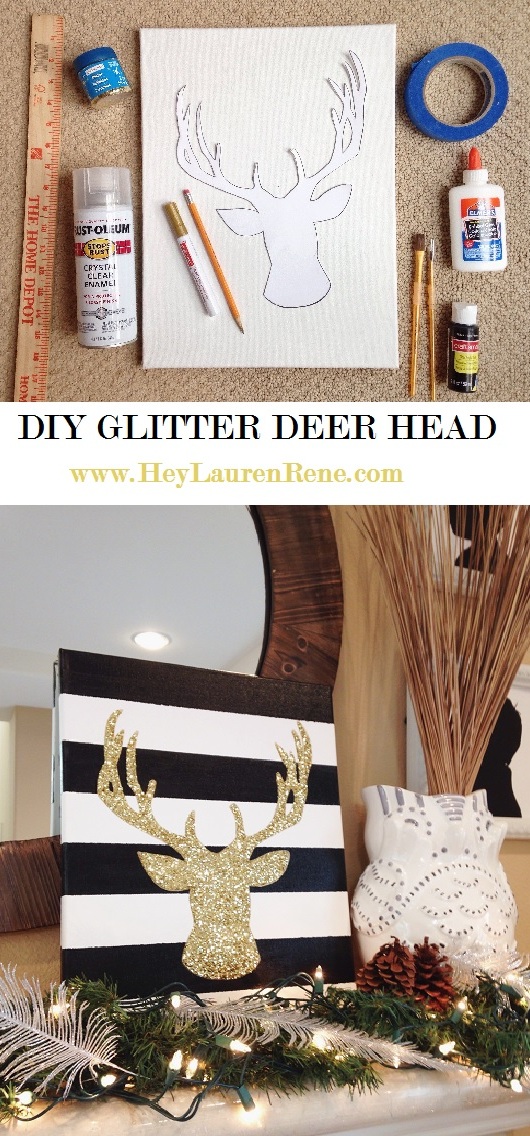
SUPPLIES:
- First go ahead and print out THIS deer head template onto cardstock (scroll down two photos)
- Canvas (mine was 12″x 16″)
- Gold glitter
- Small bottle of black gloss acrylic paint
- Large and small paint brush
- Pencil
- Yardstick
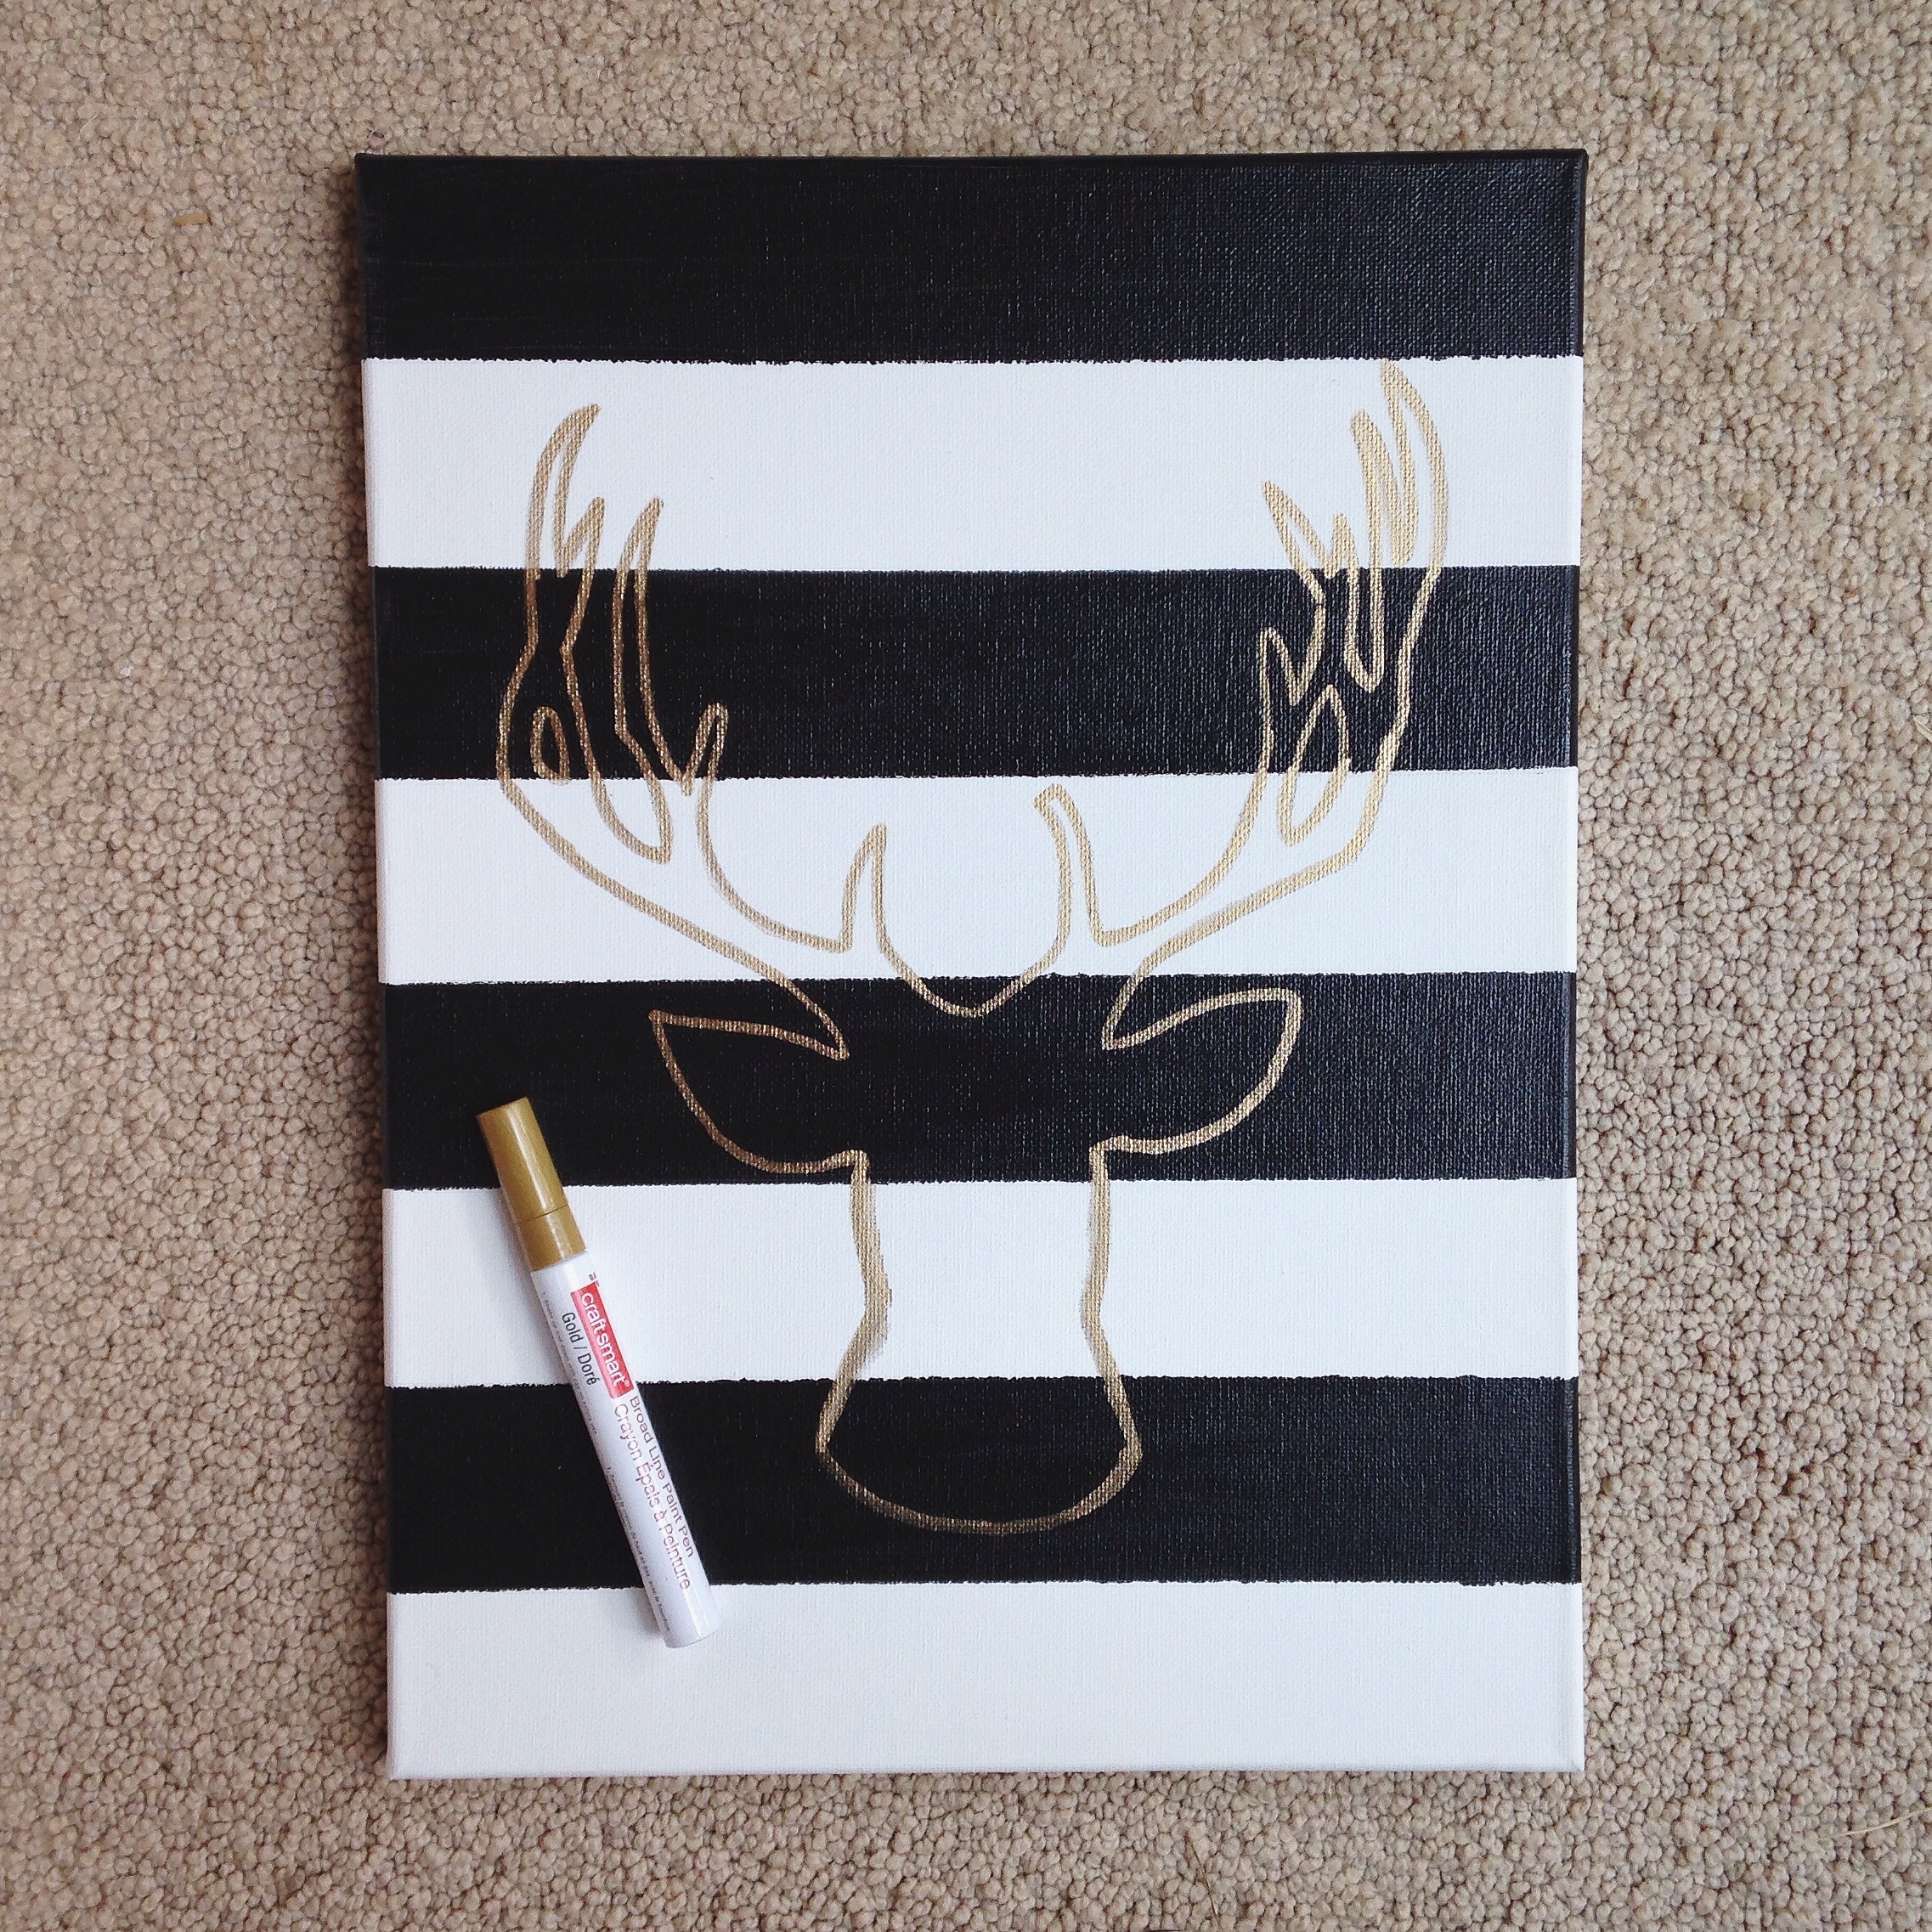
- Liquid gold marker/pen **I’m convinced this made all the difference
- Blue painters tape
- Elmer’s glue
- Clear enamel spray or hair spray
Step 1: I printed out the deer head then enlarged it by 20% on my printer/copier onto two sheets of cardstock. Taped them together and cut out the silhouette (you can leave it an on an 8×10 if you want I just wanted mine a little larger)
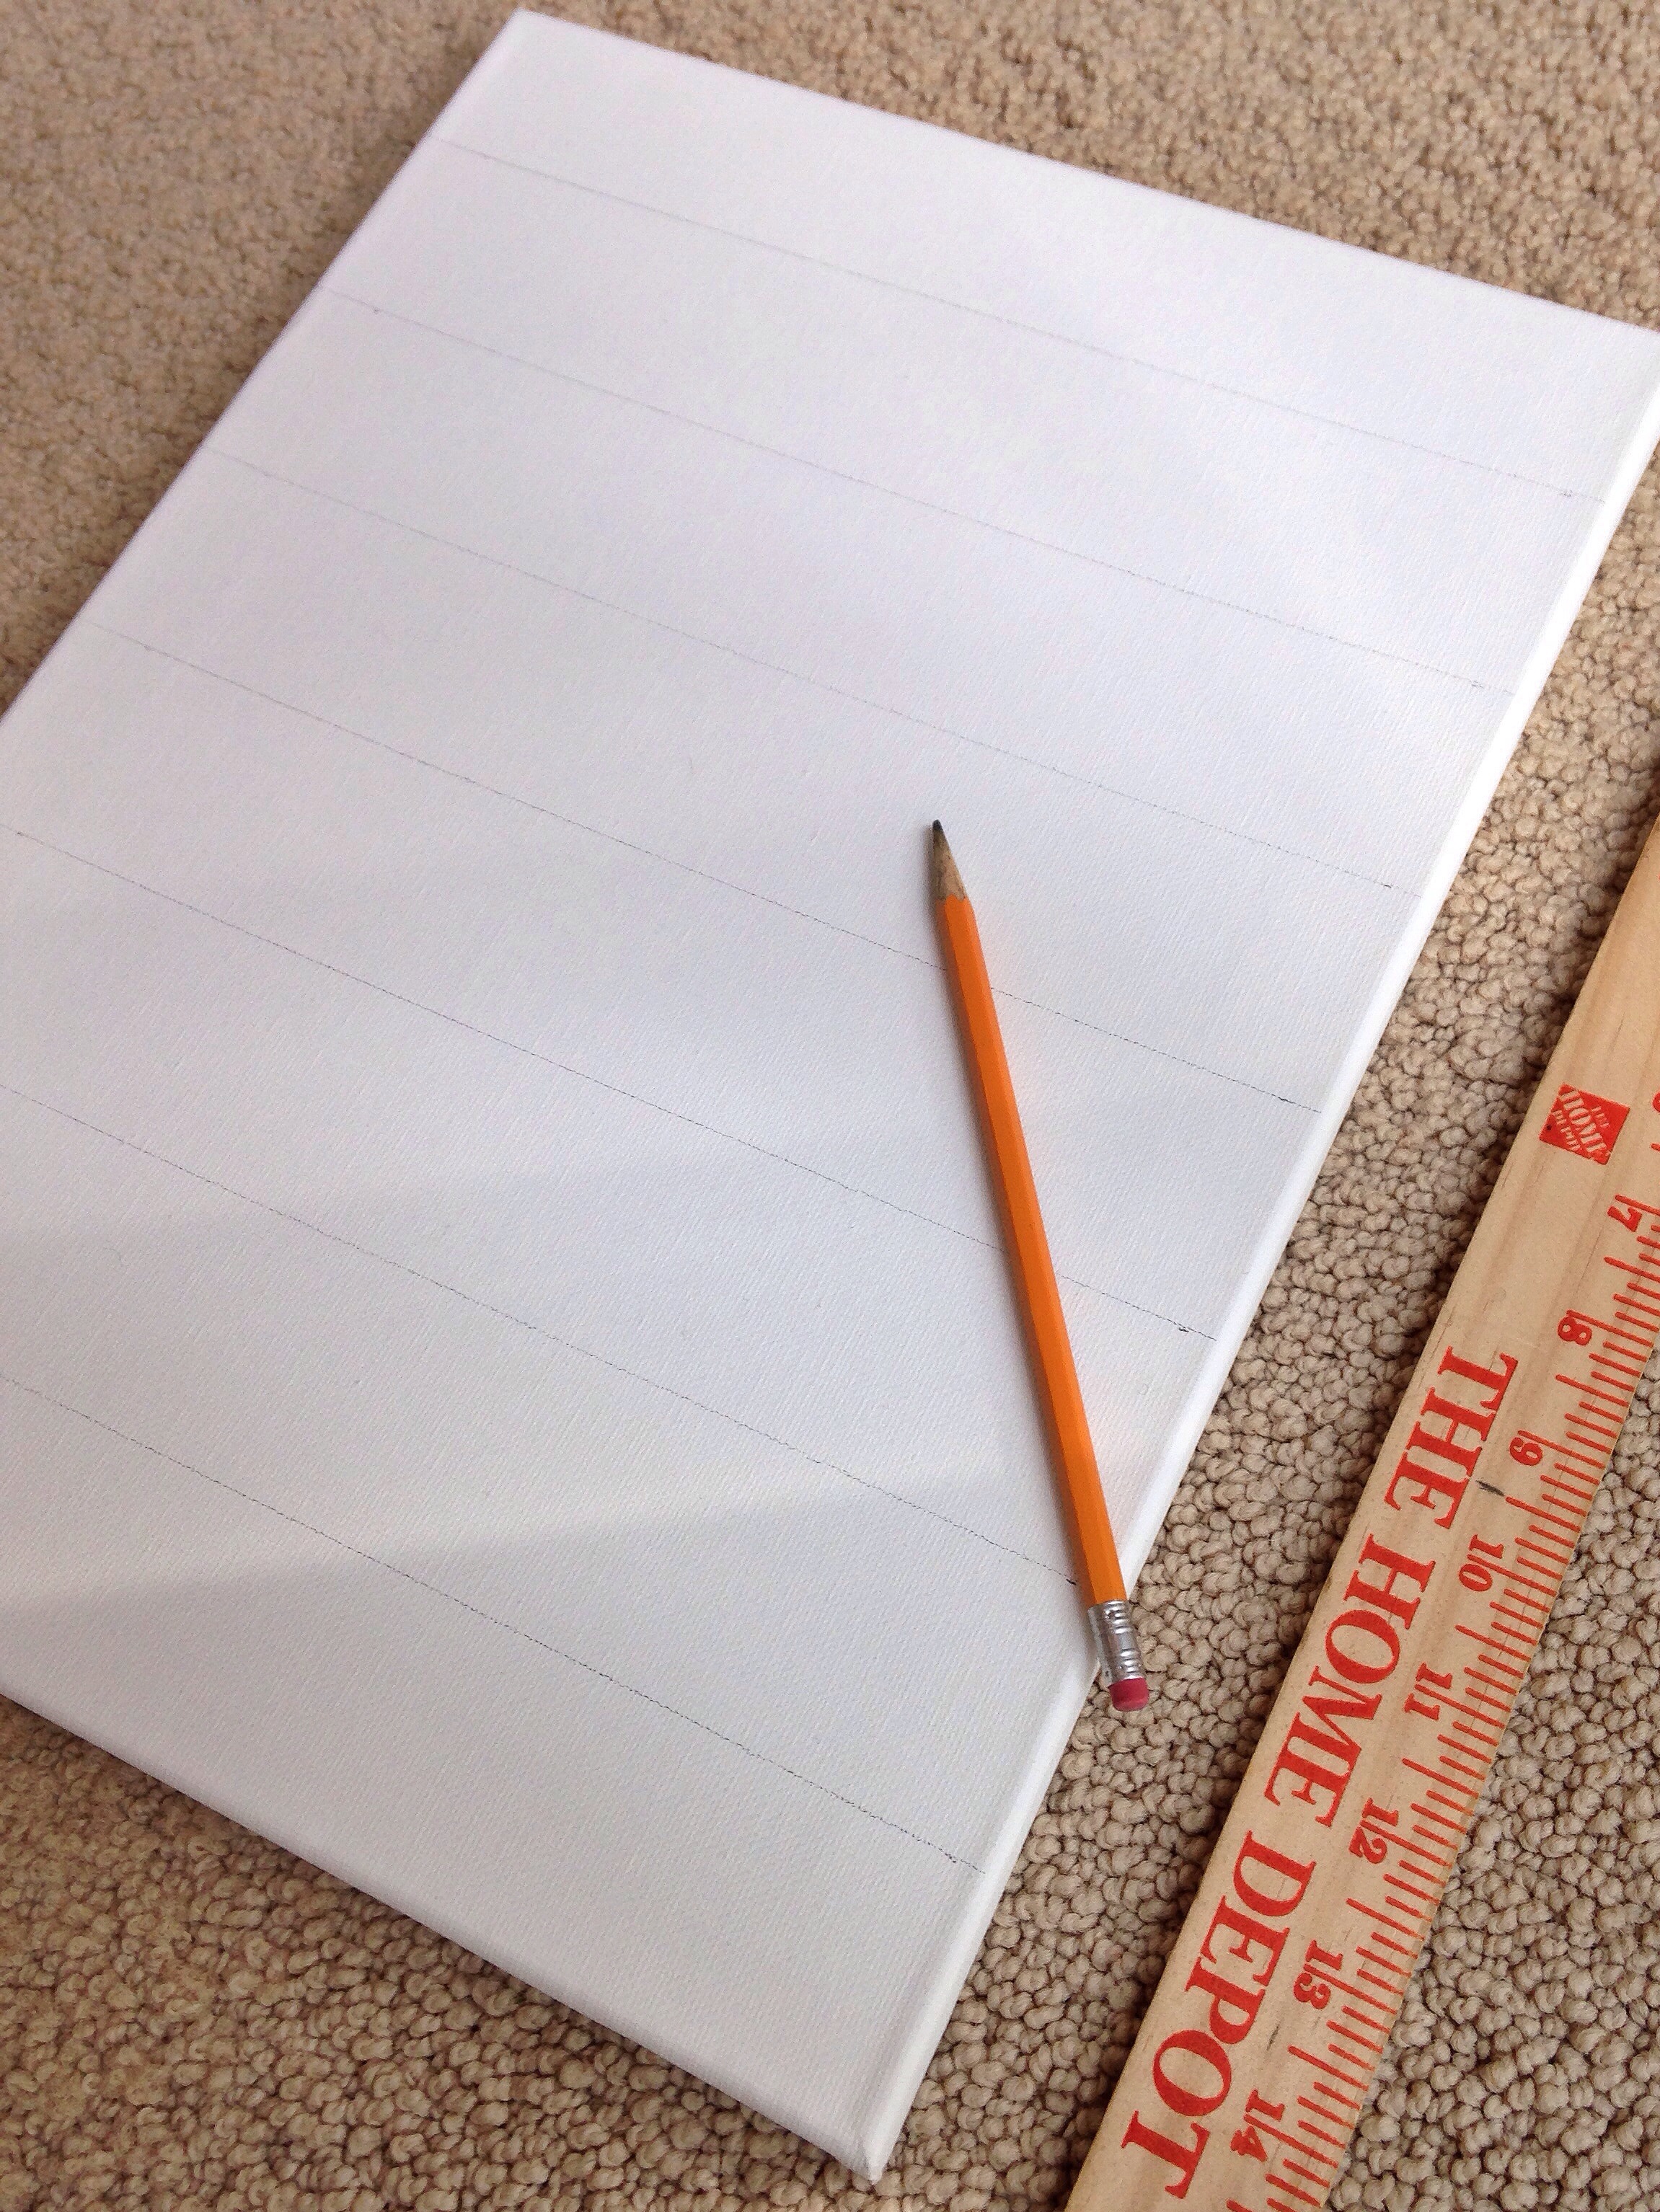
Step 2: I marked off 2″ wide stripes on the canvas with a pencil and the yardstick (just divide evenly based on the size of your canvas)
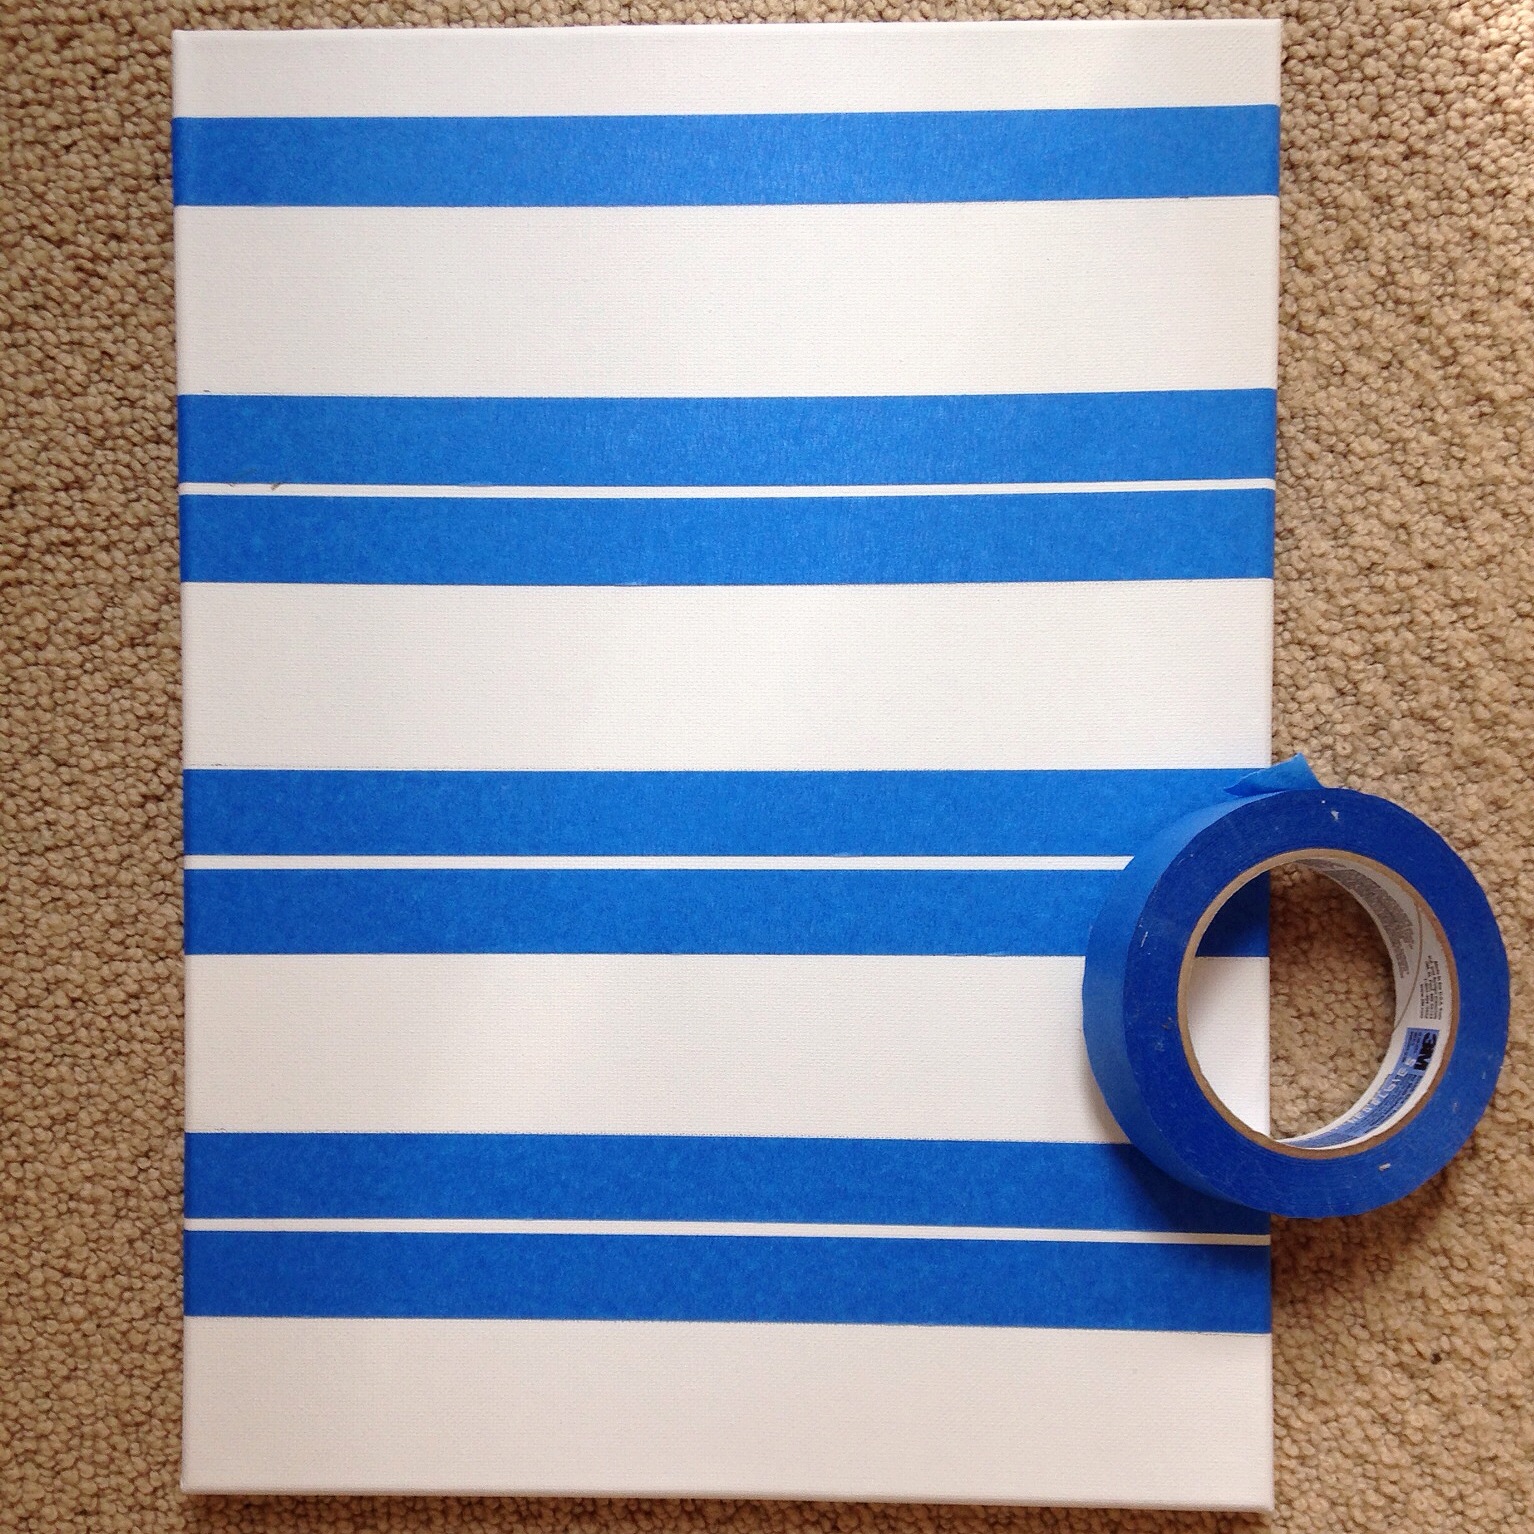
Step 3: Use blue painter’s tape to mask off the stripes you don’t want paint on. Wrap the tape around the sides to the back so you can paint the edges too. Once the blue tape is on, paint the black gloss paint on the alternating stripes. Allow to dry. Then remove the painter’s tape.
Step 4: Place the deer head cutout on top of the canvas and trace with a pencil.
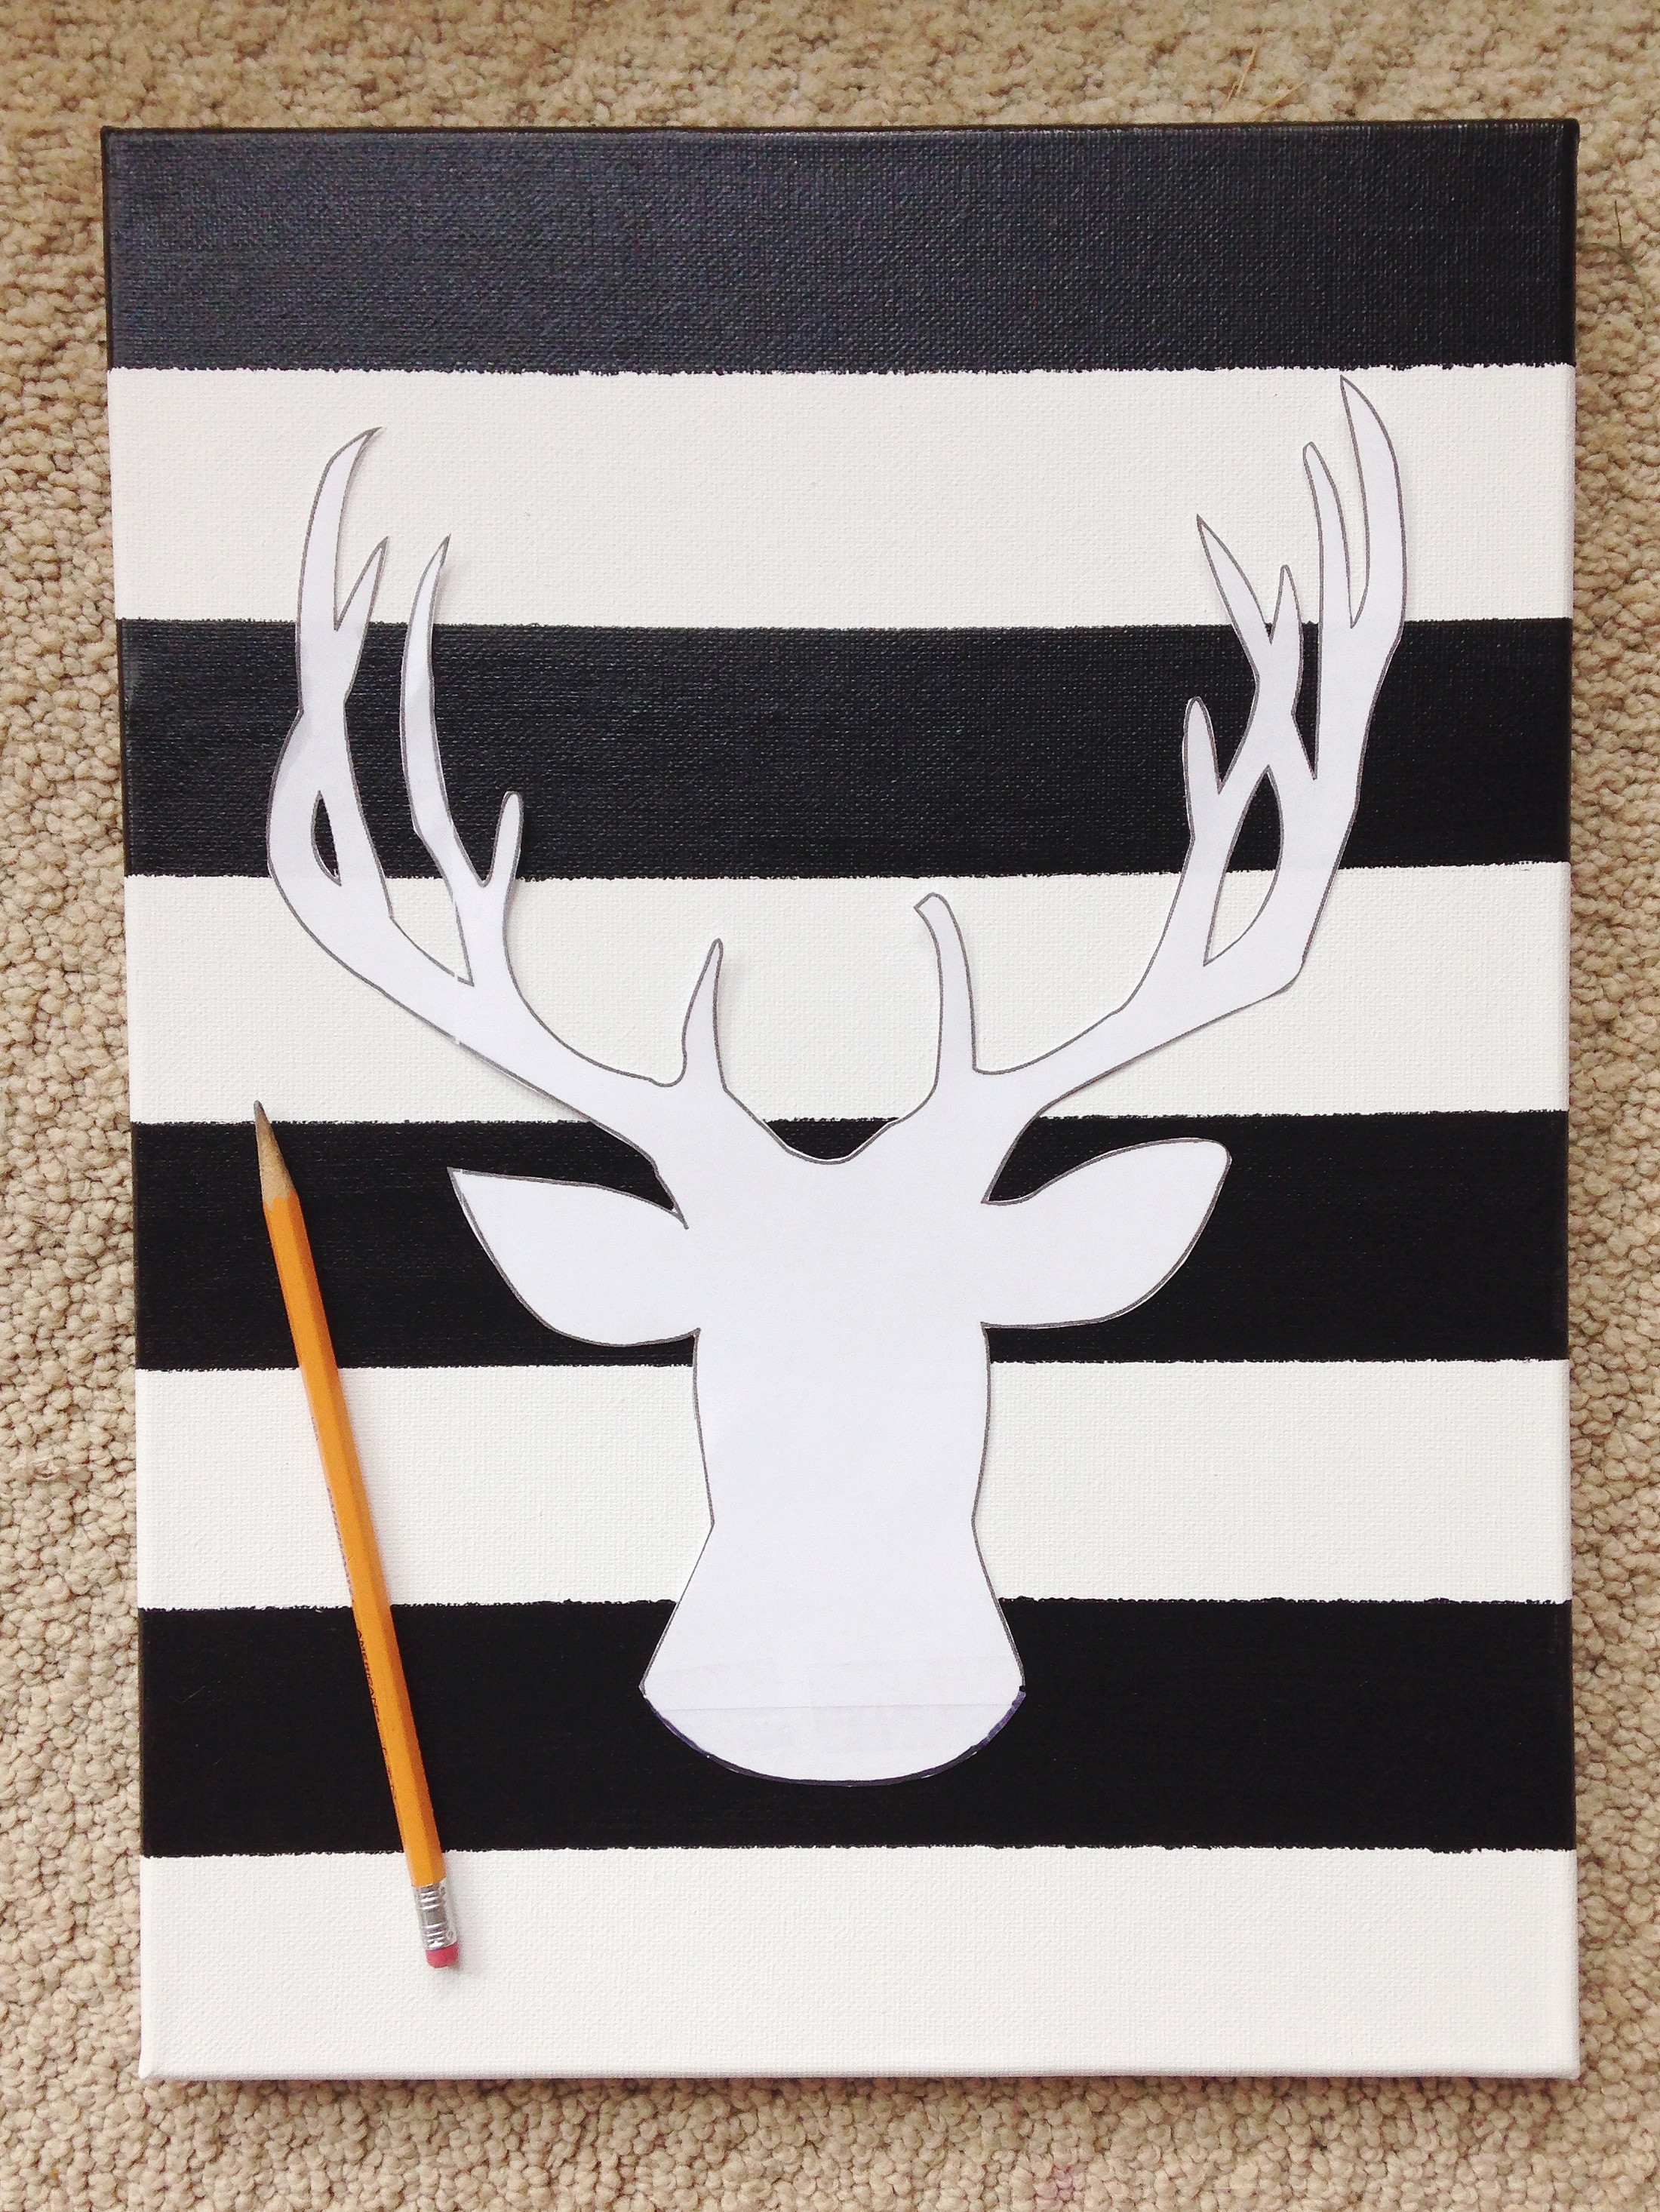
Step 5: Once you have traced the whole template, remove and go over the pencil with the liquid gold marker. This is a huge step a lot of the tutorials skipped, but I think it’s so important. It’s hard to get clean edges with the glue so the gold marker will give you a perfect outline.
Step 6: Use a combination of your large and small paint brush to fill in the outline generously with white glue. The thicker you put the glue the more dimensional it looks. Try to stay slightly within the gold outline so the edges stay crisp.
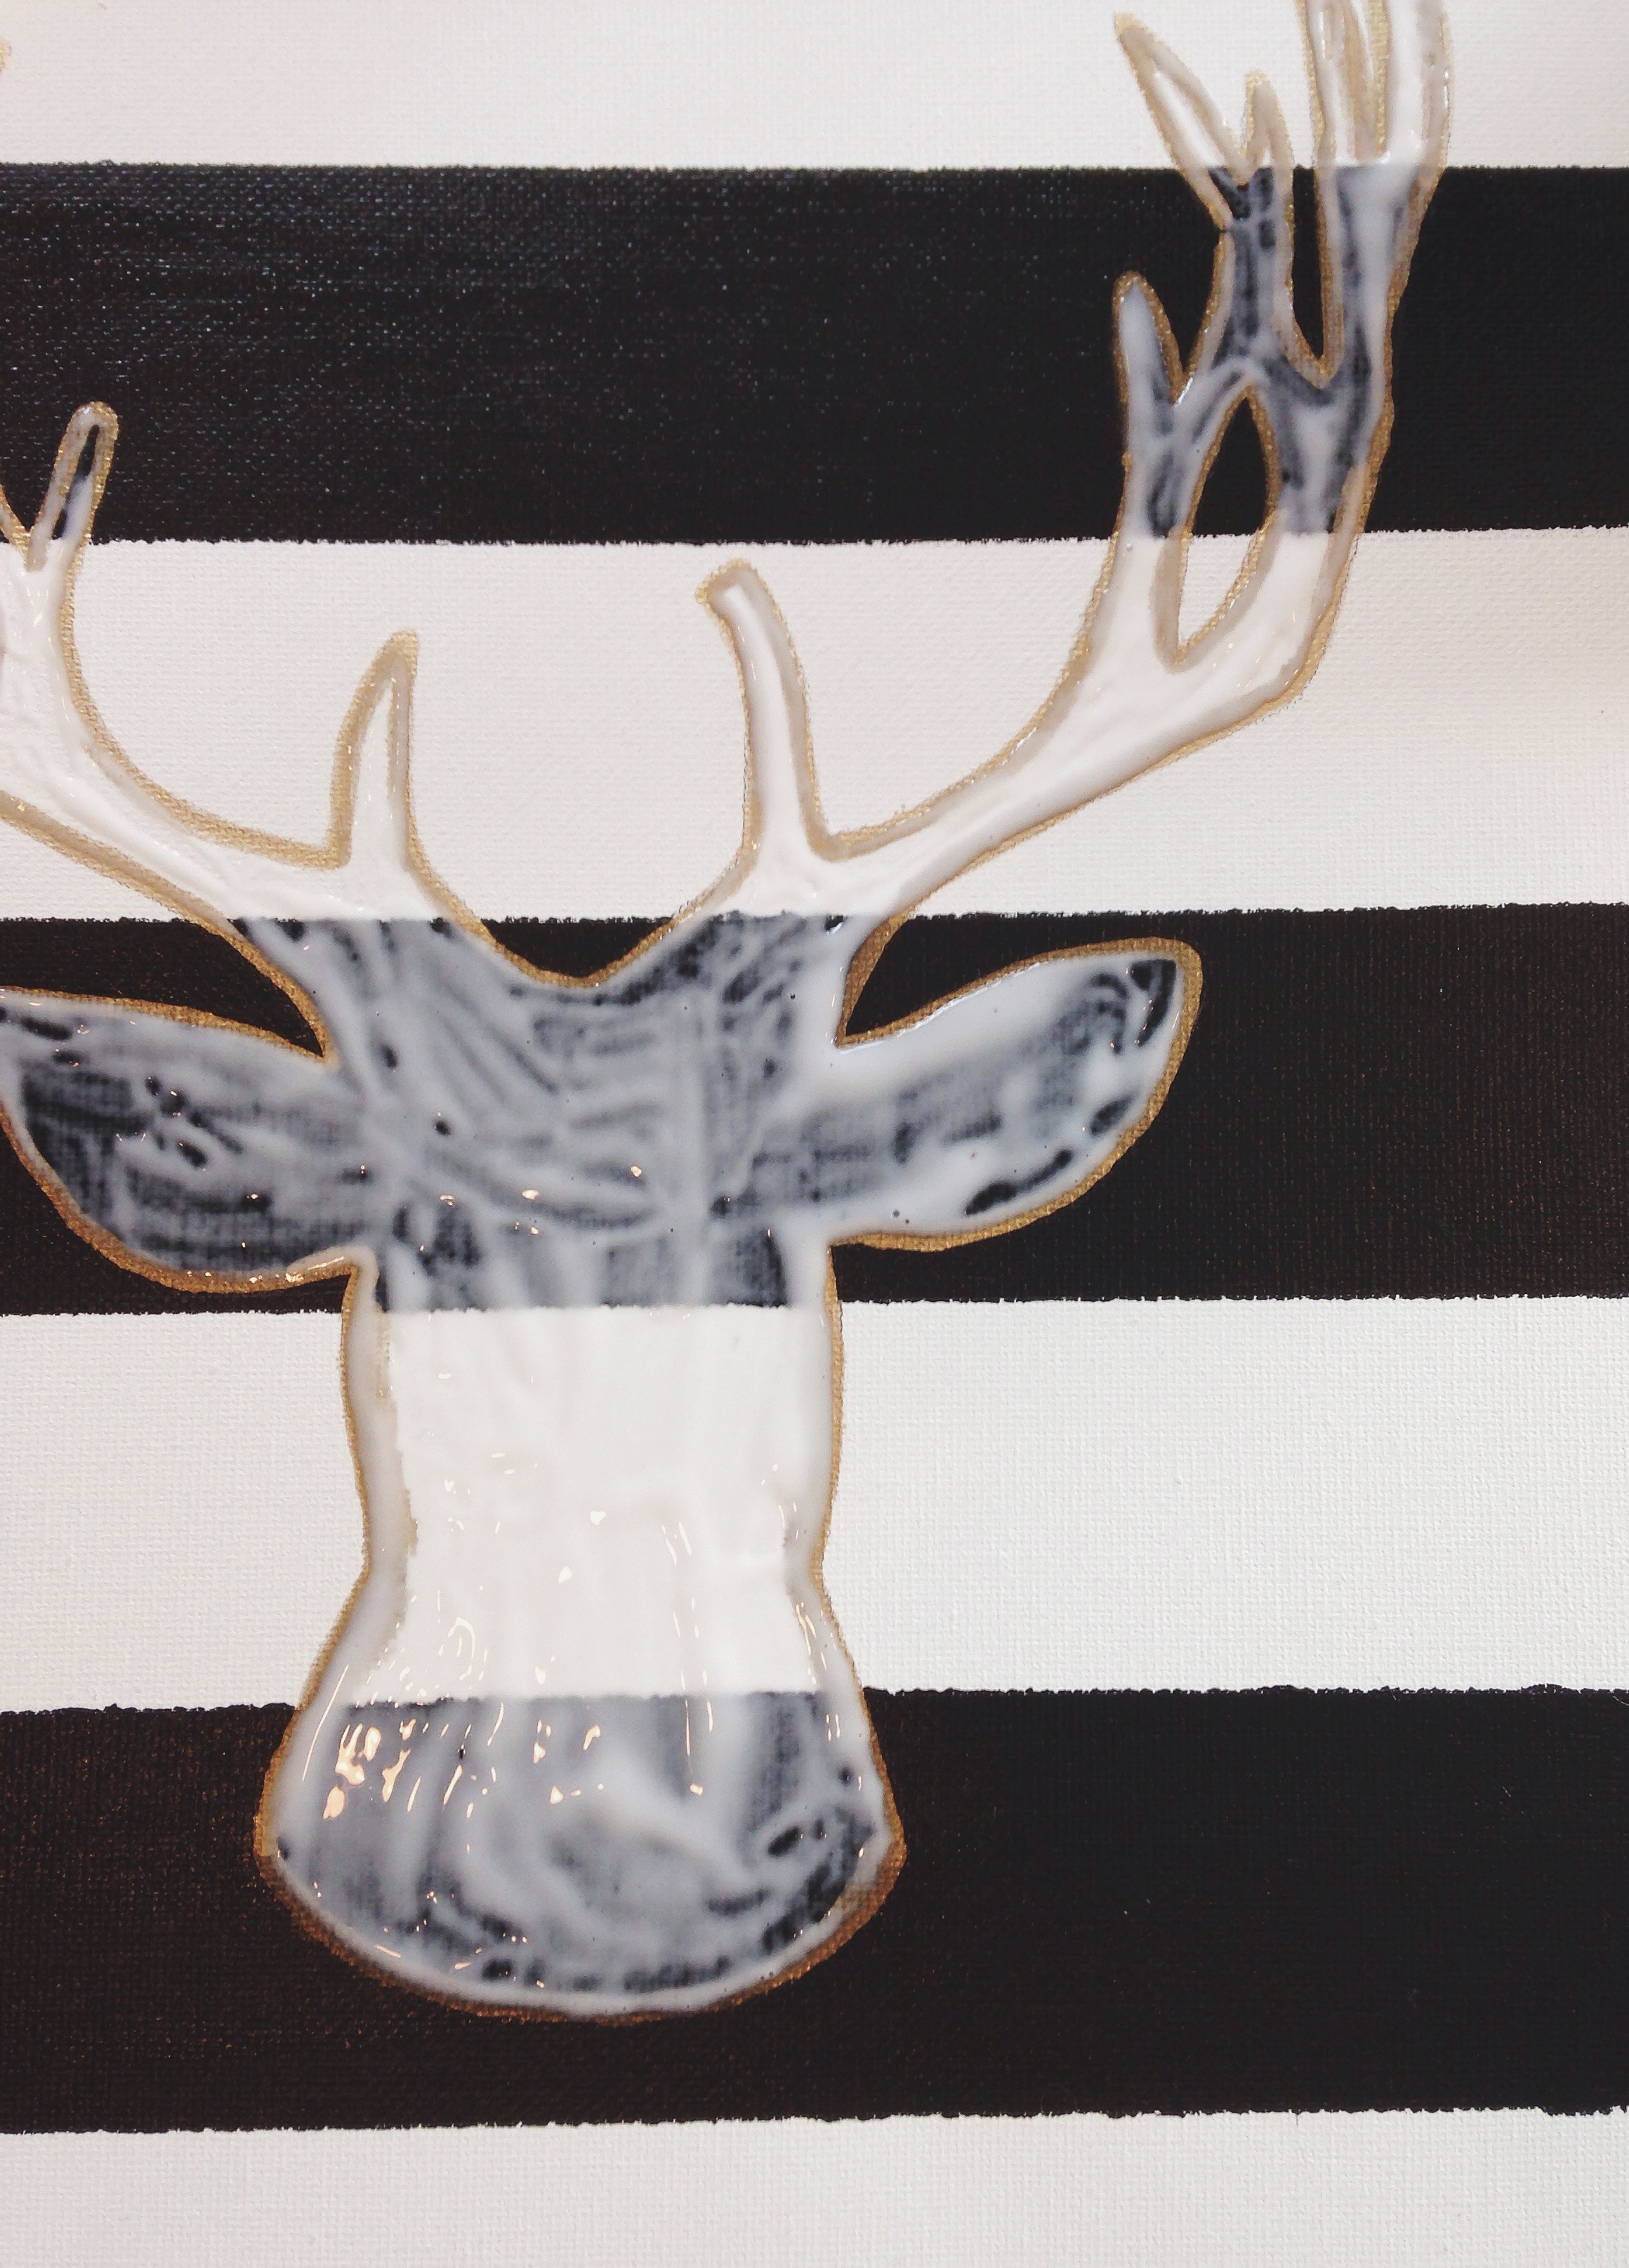
Step 7: Dump on the glitter and let it set for about a minute. When done shake off into a paper grocery bag (so you can pour the excess back into the container). If there are any spotty areas you can touch them up with glue and glitter. I also used a dry paintbrush and brushed away any glitter that fell outside the lines. When done give a light coat of enamel spray or hairspray to keep the glitter in place.
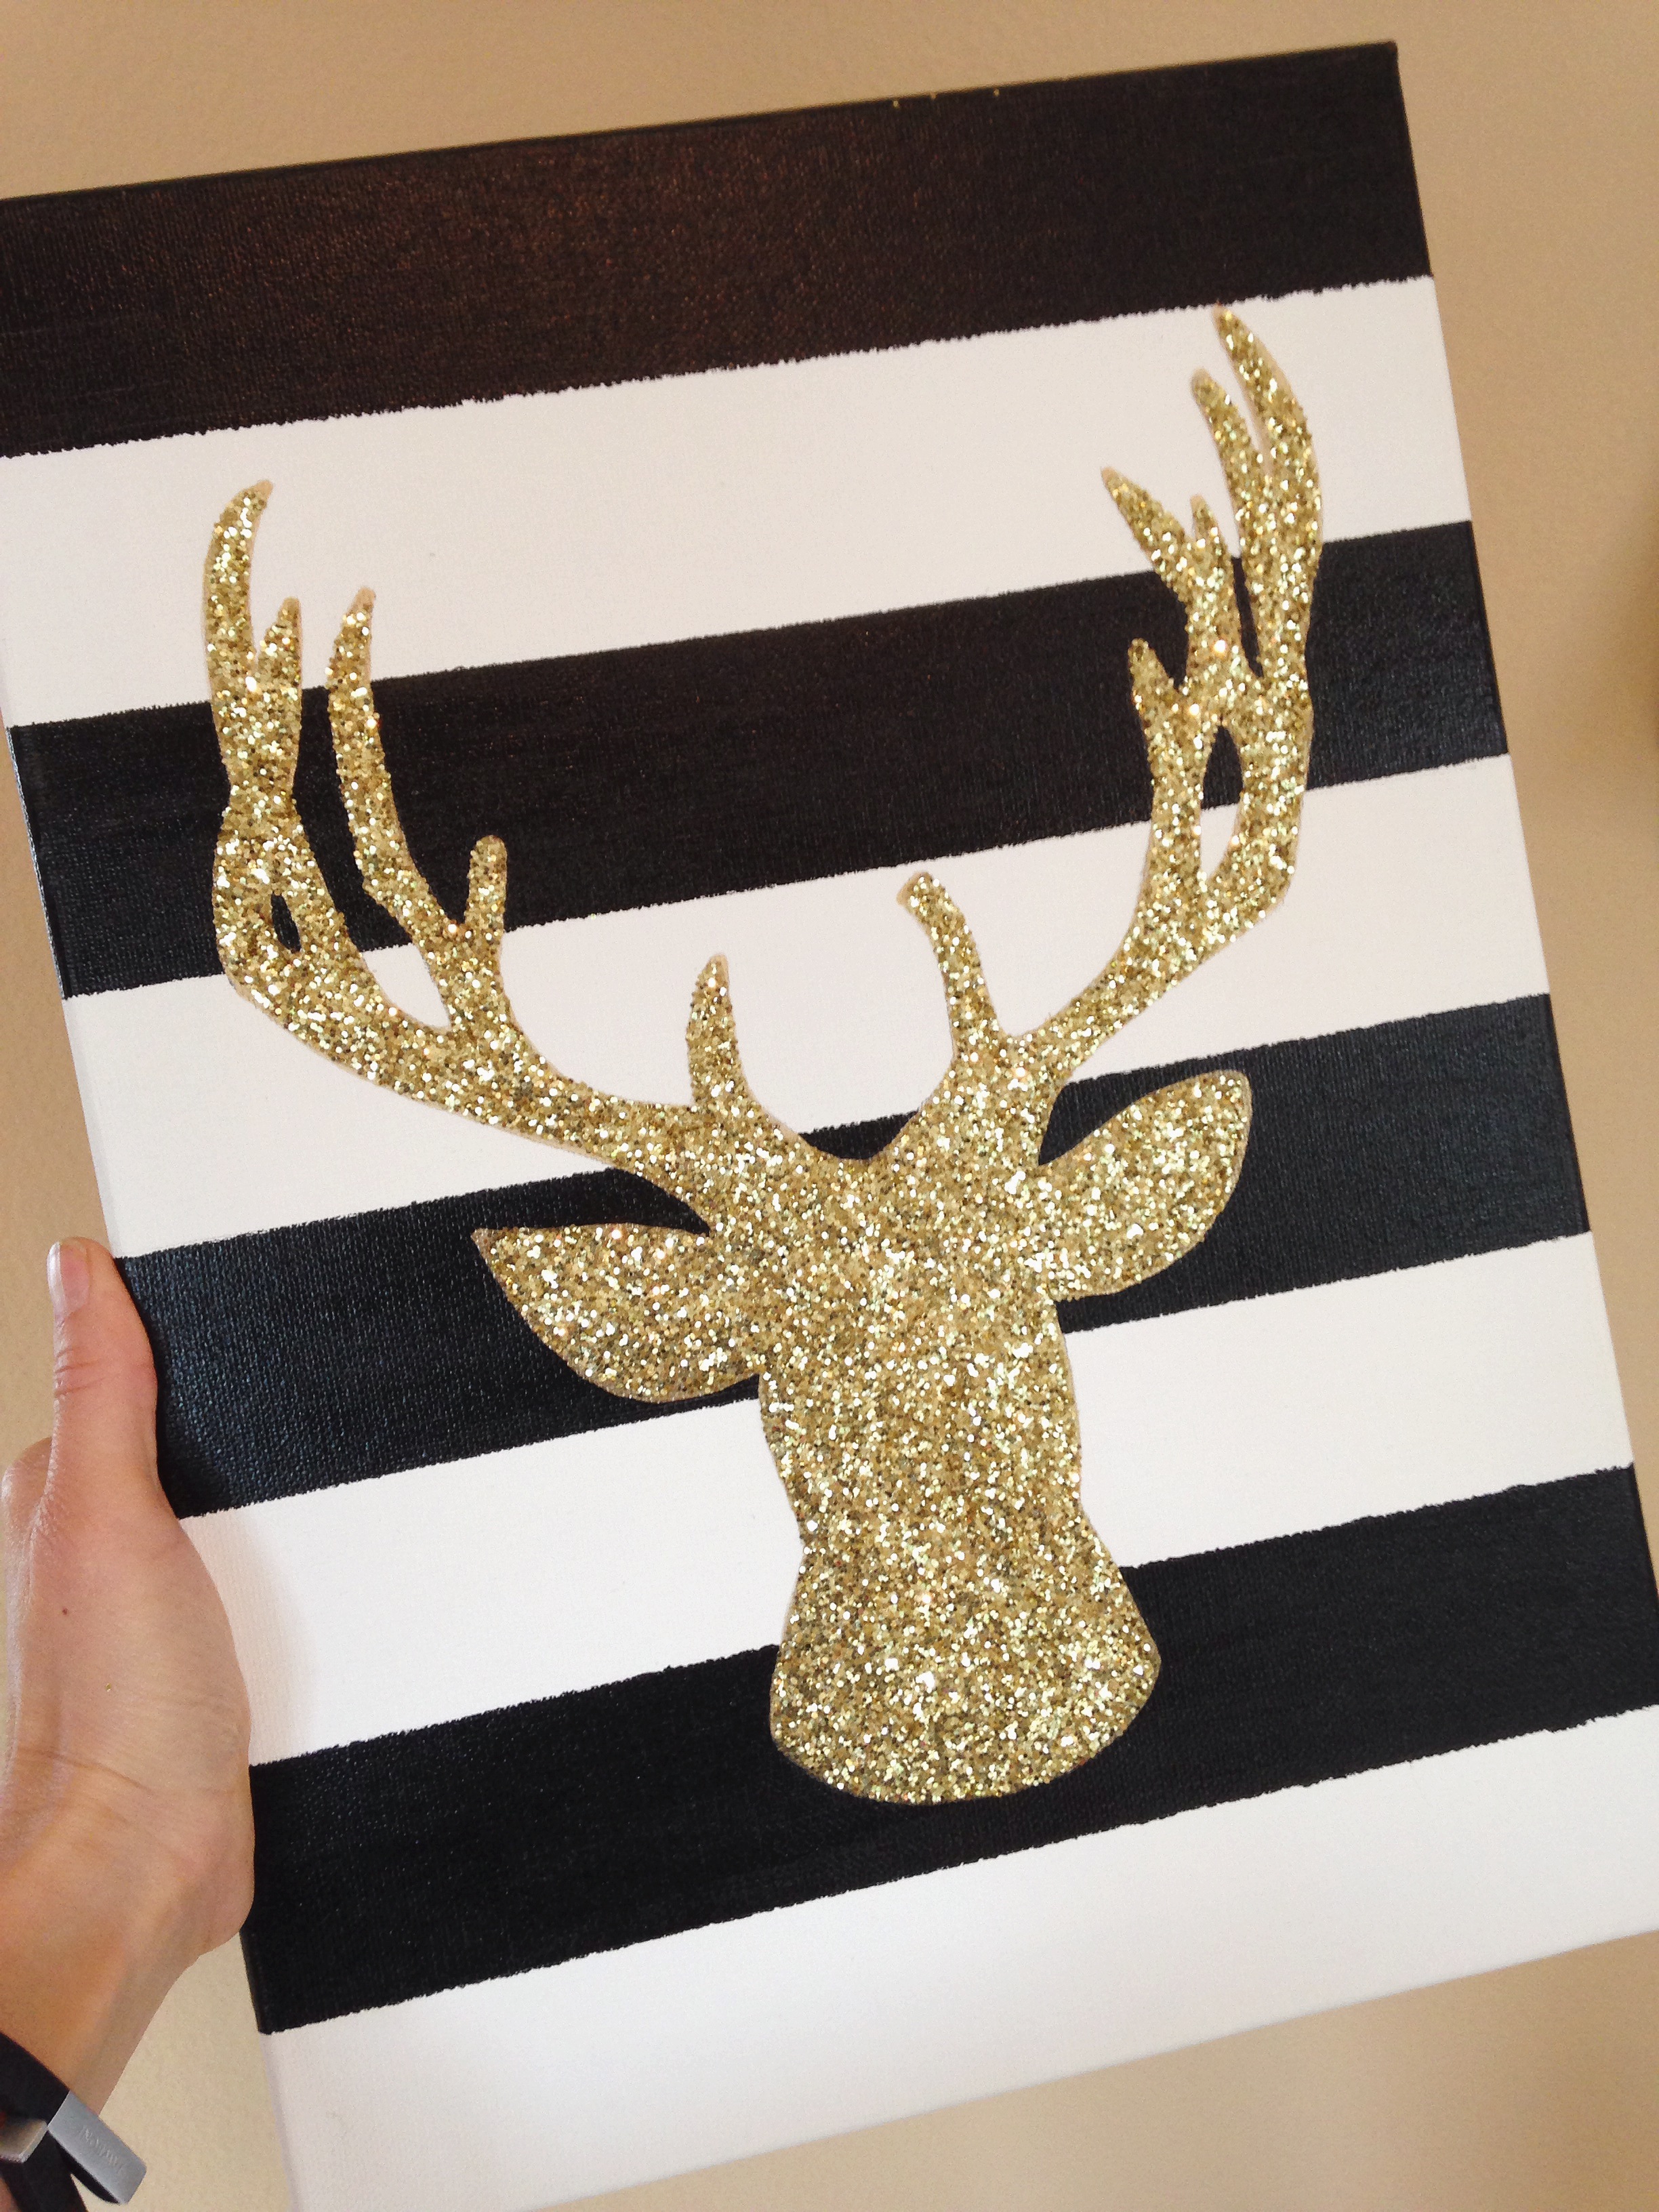
I think by now you know I am a bit of a craftaholic. Let me tell you…this is one of my favorite DIY projects I have ever done. I just love how it turned out and keep moving it all over the house because I can’t get enough of it. The only problem I am left with is which household items should I choose to cover in all that leftover gold glitter? Lookout mason jars, I think I’m coming after you next! Happy crafting!


This is adorable!!! I can’t wait to drag all of our Christmas stuff out of the attic. I’m a little behind. Not sure if crafting is going to happen this year but I can dream
This is beyond crafting – crafts look homemade, this is professional. Looks sooo great. Love the idea – might have to tackle it one day after I finally get C’s room done. I have a canvas standing in my way for that room… ugh!
I made 3 of these last night for our Christmas party today! I used 3 different templates and painted a chevron pattern instead of straight lines. They turned out amazing! Your tip about the gold marker was right on.! That made it so much neater. I’m glad I found your site before I attempted this.
I love the chevron idea…I’m sure they were a hit! So happy the gold marker tip helped you out! Happy Holidays
Thank you so much for linking back to my blog!! And oh my word!! I am obsessed with how yours came out!! I want to make another one and copy yours!!
Of course..thank you for the inspiration to make mine! It’s such a fun DIY…I kind of want to make more too with you but as gifts! Go get glittery girl!
I definitely want to make this & modify it a little bit! We called my grandpa “moose” & he just passed away on Thanksgiving. This looks a lot like a moose, and I think this would be a great addition to my room as a little reminder of my grandpa Thanks for posting, Lauren! I love your blog!
I am so sorry to hear about the loss of your Grandpa Mally. What a great idea to make this and hang it year round to think of him. Thank you for your comment, excited to check out your blog! Have a wonderful Christmas and happy new year to you and your family!
So in love with this and wanted to go and pick up all supplies needed. Only thing, I cant print the deer head! It takes me to an unknown page

help or reference how to get it?!
Sorry about that…if you click through a few of the posts I link to the template is there. Just could be a little confusing to get there. Hopefully this direct link works for you! http://manmadediy.com/downloads
I clicked on the link to find the deer printable and it took me to a random man made site and it was nowhere to be found?! Please help!
I had the same problem, did you find the link?
I had the same problem, did you find the link?
The man made site is correct you just have to scroll down two pictures and it asks you if you want to download
Deer Head Silhouette [PDF]
Deer Head Silhouette [JPG]
HI! I love this idea and have actually started it already! I was going to head to the craft store to buy glitter bc i didn’t want to waste the glitter I had here, but I was wondering what kind of glue and glitter you used. It looks like a medium sized glitter, not too chunky or thin but I wasnt positive. Thanks!
It looks like the Creatology brand glitter to me. I found some gold at Michaels craft supply. Hope that helps!
I turned this into a cake!
I think I love him! This is going to be one of my holiday or winter projects.
It’s so Cute! ^ ^
I want to make it!
& scrap your posting on my blog ^^
Just made this and it was so fun and easy! Really makes my living room sparkle
Aww yay I am so glad you enjoyed making one! It really is such a fun project and I totally think it can stay up year round
Deer head template link:
http://www.manmadediy.com/m/172-manmade-video-how-to-make-a-faux-wood-deer-head-silhouette
Thanks for the great tutorial. I finally got around to making this and it turned out great. It used much less glitter than I expected so now I have lots of ideas to use up my supplies!
Lalalala…Love this sign! Perfect for Winter, heck perfect for all year! Holly
Wooow!!! so cute! I can’t wait to digging in. I might try some red or green colors for a deeper Christmas atmosphere. I hope it will work.
Do you think I can use a glue gun instead of the one you are using?
Thanks for sharing!!
Greetings from Switzerland