 It’s been awhile since I’ve been crafty around here, so I decided to do a quick Michael’s drive-by yesterday with Shane in tow. This means I had all of 10 minutes to fly through the store with him kicking and screaming. That, paired with having no idea what I was even there for, lead to a rather unproductive and stressful trip to the craft store (do you see why I have taken a break from crafting?). I grabbed some canvas, some wooden letters and got out of there as quickly as I could.
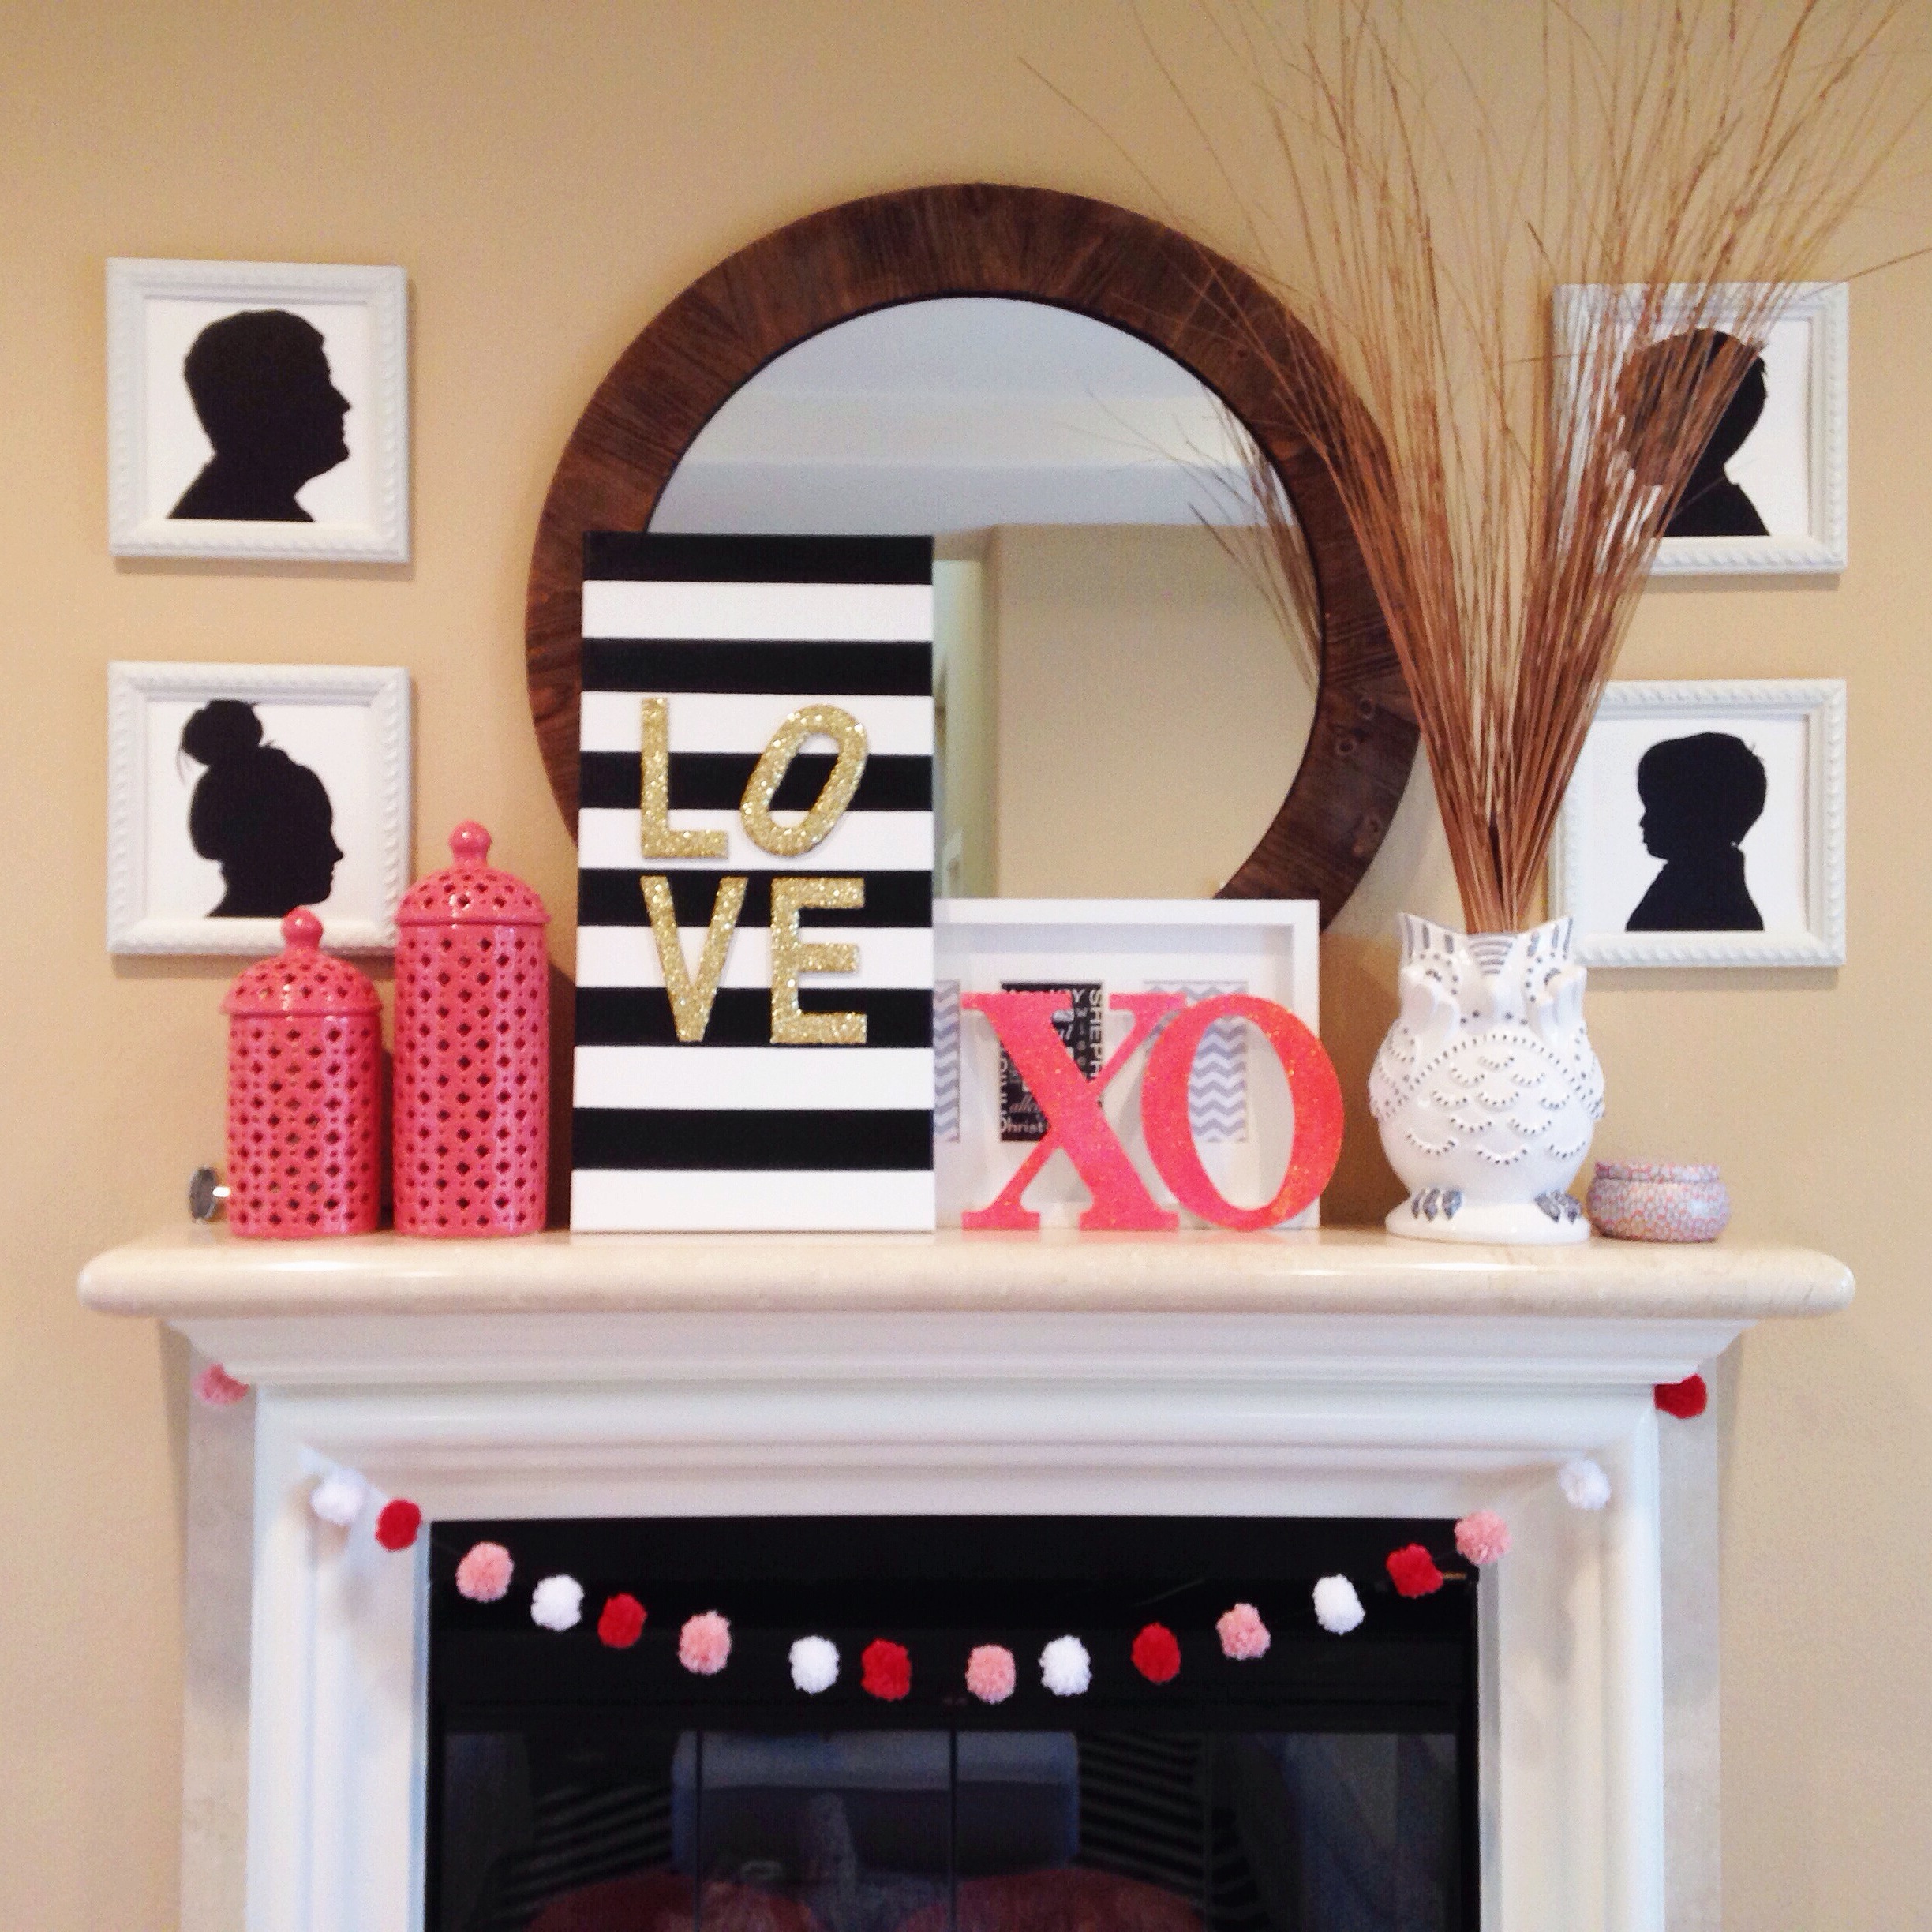
Once I got home I realized I didn’t actually buy enough to make anything so it was time to gather some supplies I had around the house. As I rummaged through my craft bins all I kept thinking of was Glitter Deer Head project I did for Christmas. I had the gold glitter, the paint, and the canvas…ah ha, I would make another but for upstairs in our room. I bought the wooden L.O.V.E letters with Valentine’s Day in mind so I thought this would be the perfect project for this month. It could also be great for an anniversary gift, or just really any occasion….who doesn’t want some year round love?
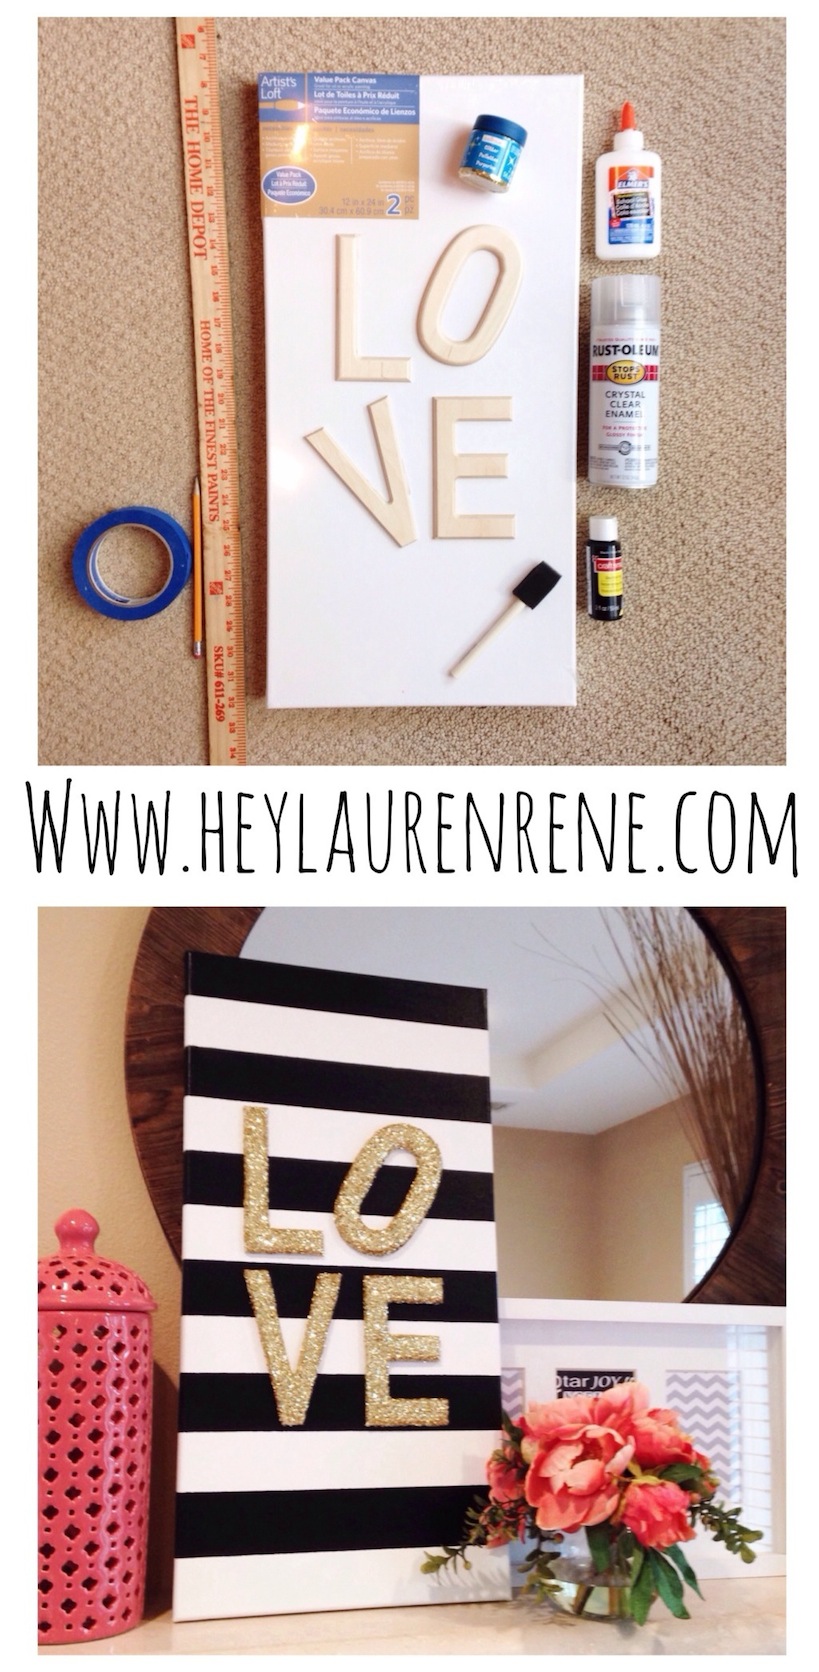
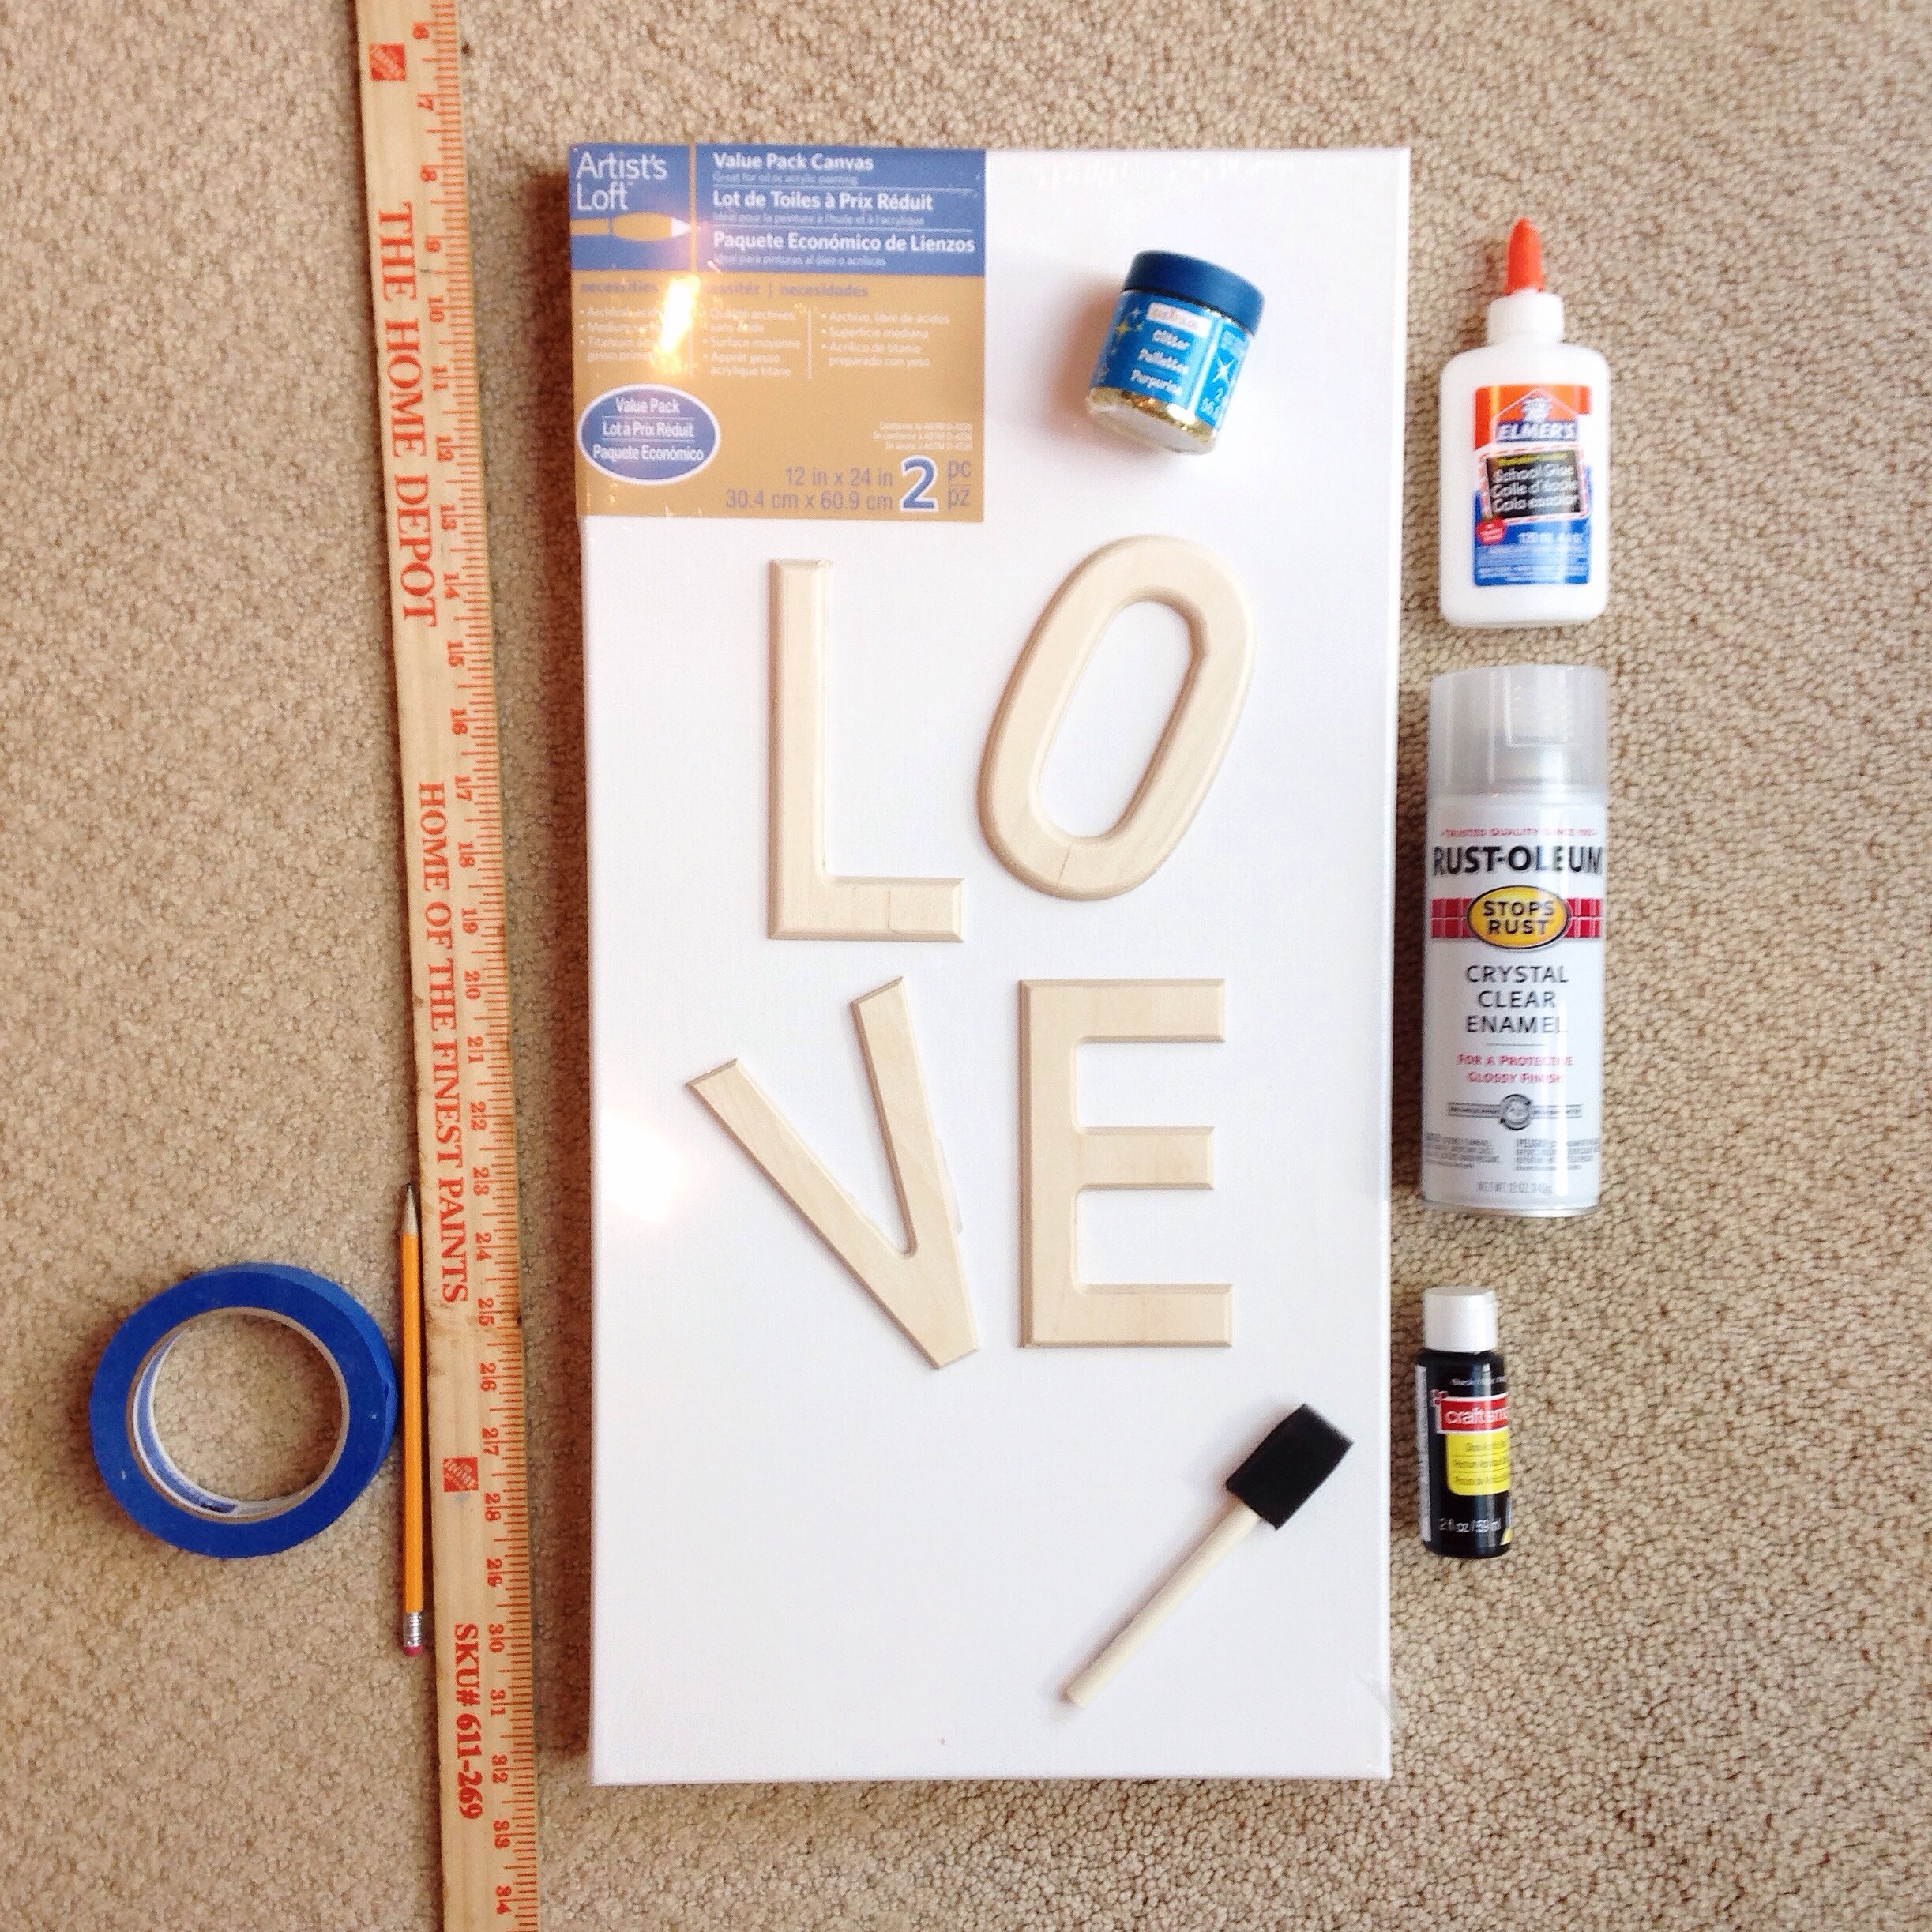
Here is what you will need:
- A canvas (mine was 12″x 24″)
- Black gloss acrylic paint and a sponge brush
- Gold glitter
- A yard stick & pencil
- Blue painters tape
- Wooden letters
- Elmer’s glue & glue gun
- Clear enamel spray
INSTRUCTIONS:
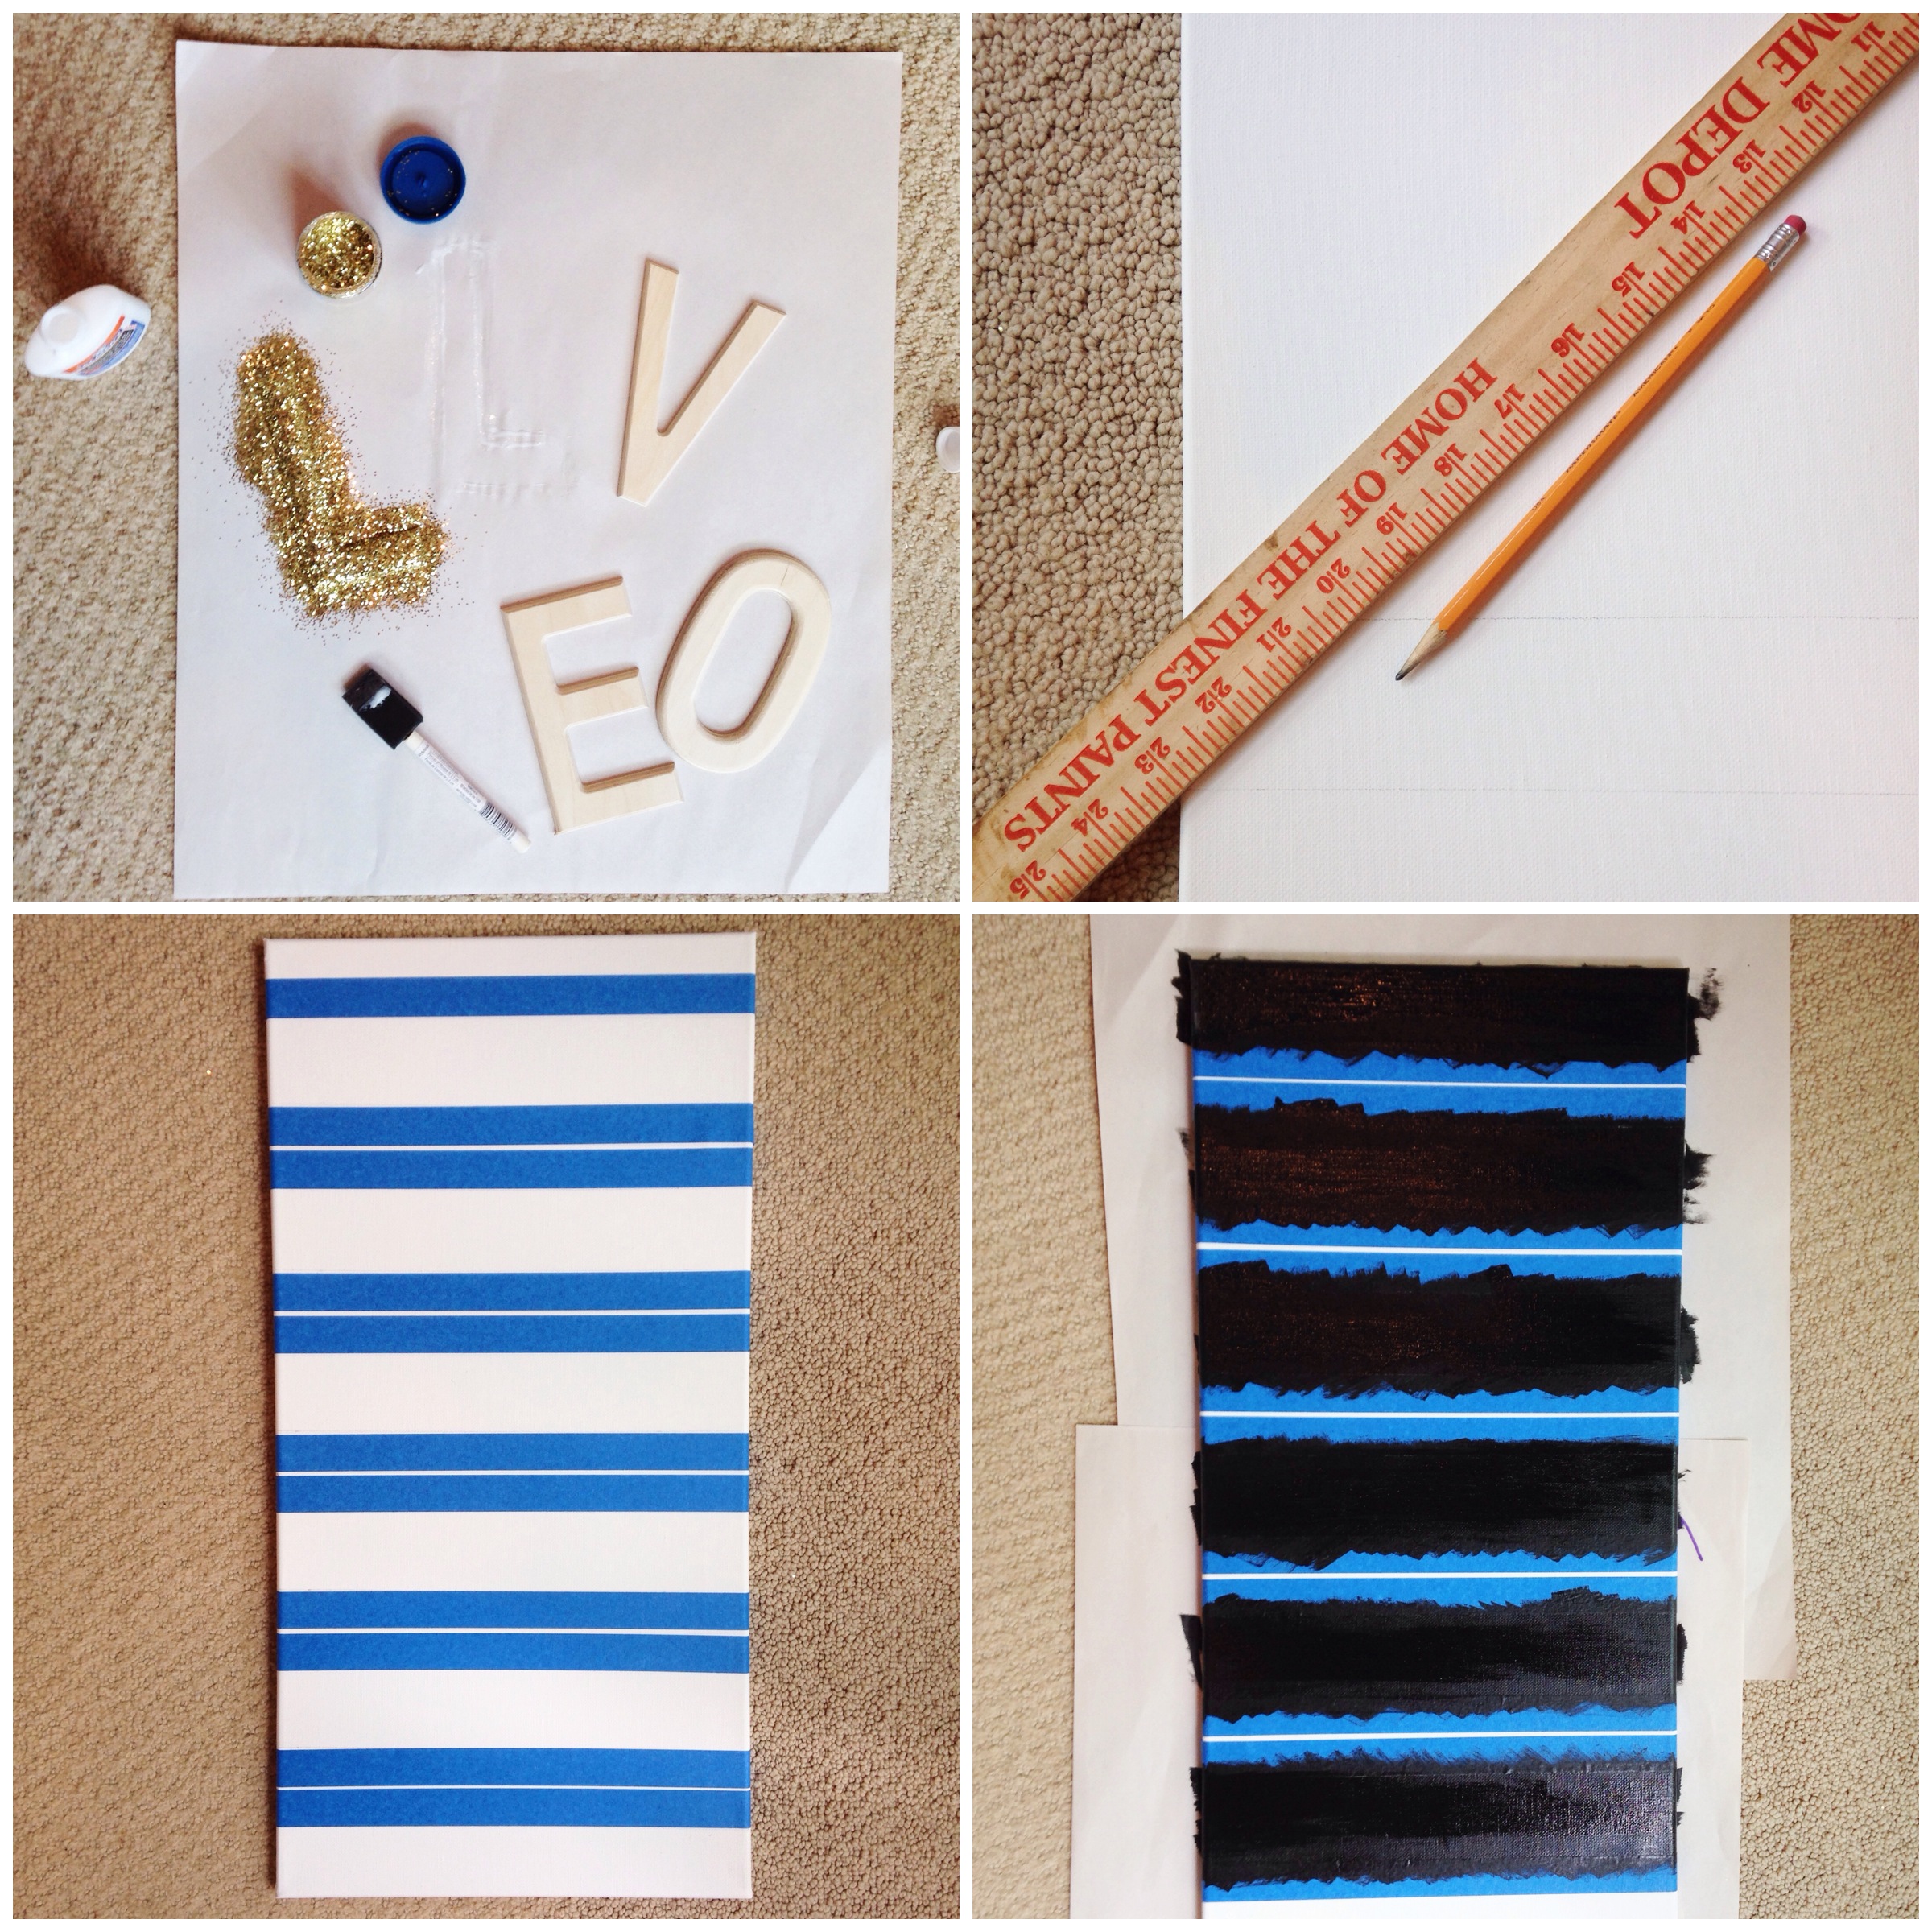
1- Using the sponge brush coat the wooden letters with Elmer’s glue and lay on a piece of newspaper. Sprinkle gold glitter generously to cover each letter. Shake the glitter off and lay the letters on another piece of newspaper. Save the excess glitter.
2- Let the glitter set for a couple of minutes and then lightly spray with the clear coat enamel spray. Leave the letters to dry while you prepare the canvas.
3- Take your canvas and yard stick to mark off the size of the lines you want. I did 2″ thick lines. Draw lightly with a pencil where each line is.
4- Using blue painters tape, mask off the lines that you want to keep white and keep open the ones you want black. Make sure you really rub the tape down so it doesn’t bleed under the tape. Make sure to run tape around and paint the sides as well.
5- Take a clean sponge brush and lightly paint the black gloss paint on the lines you want to be black. Let it dry a little and then go in with a second coat.
6- Once dry, remove the painters tape.
7- Glue gun on your gold glitter letters.
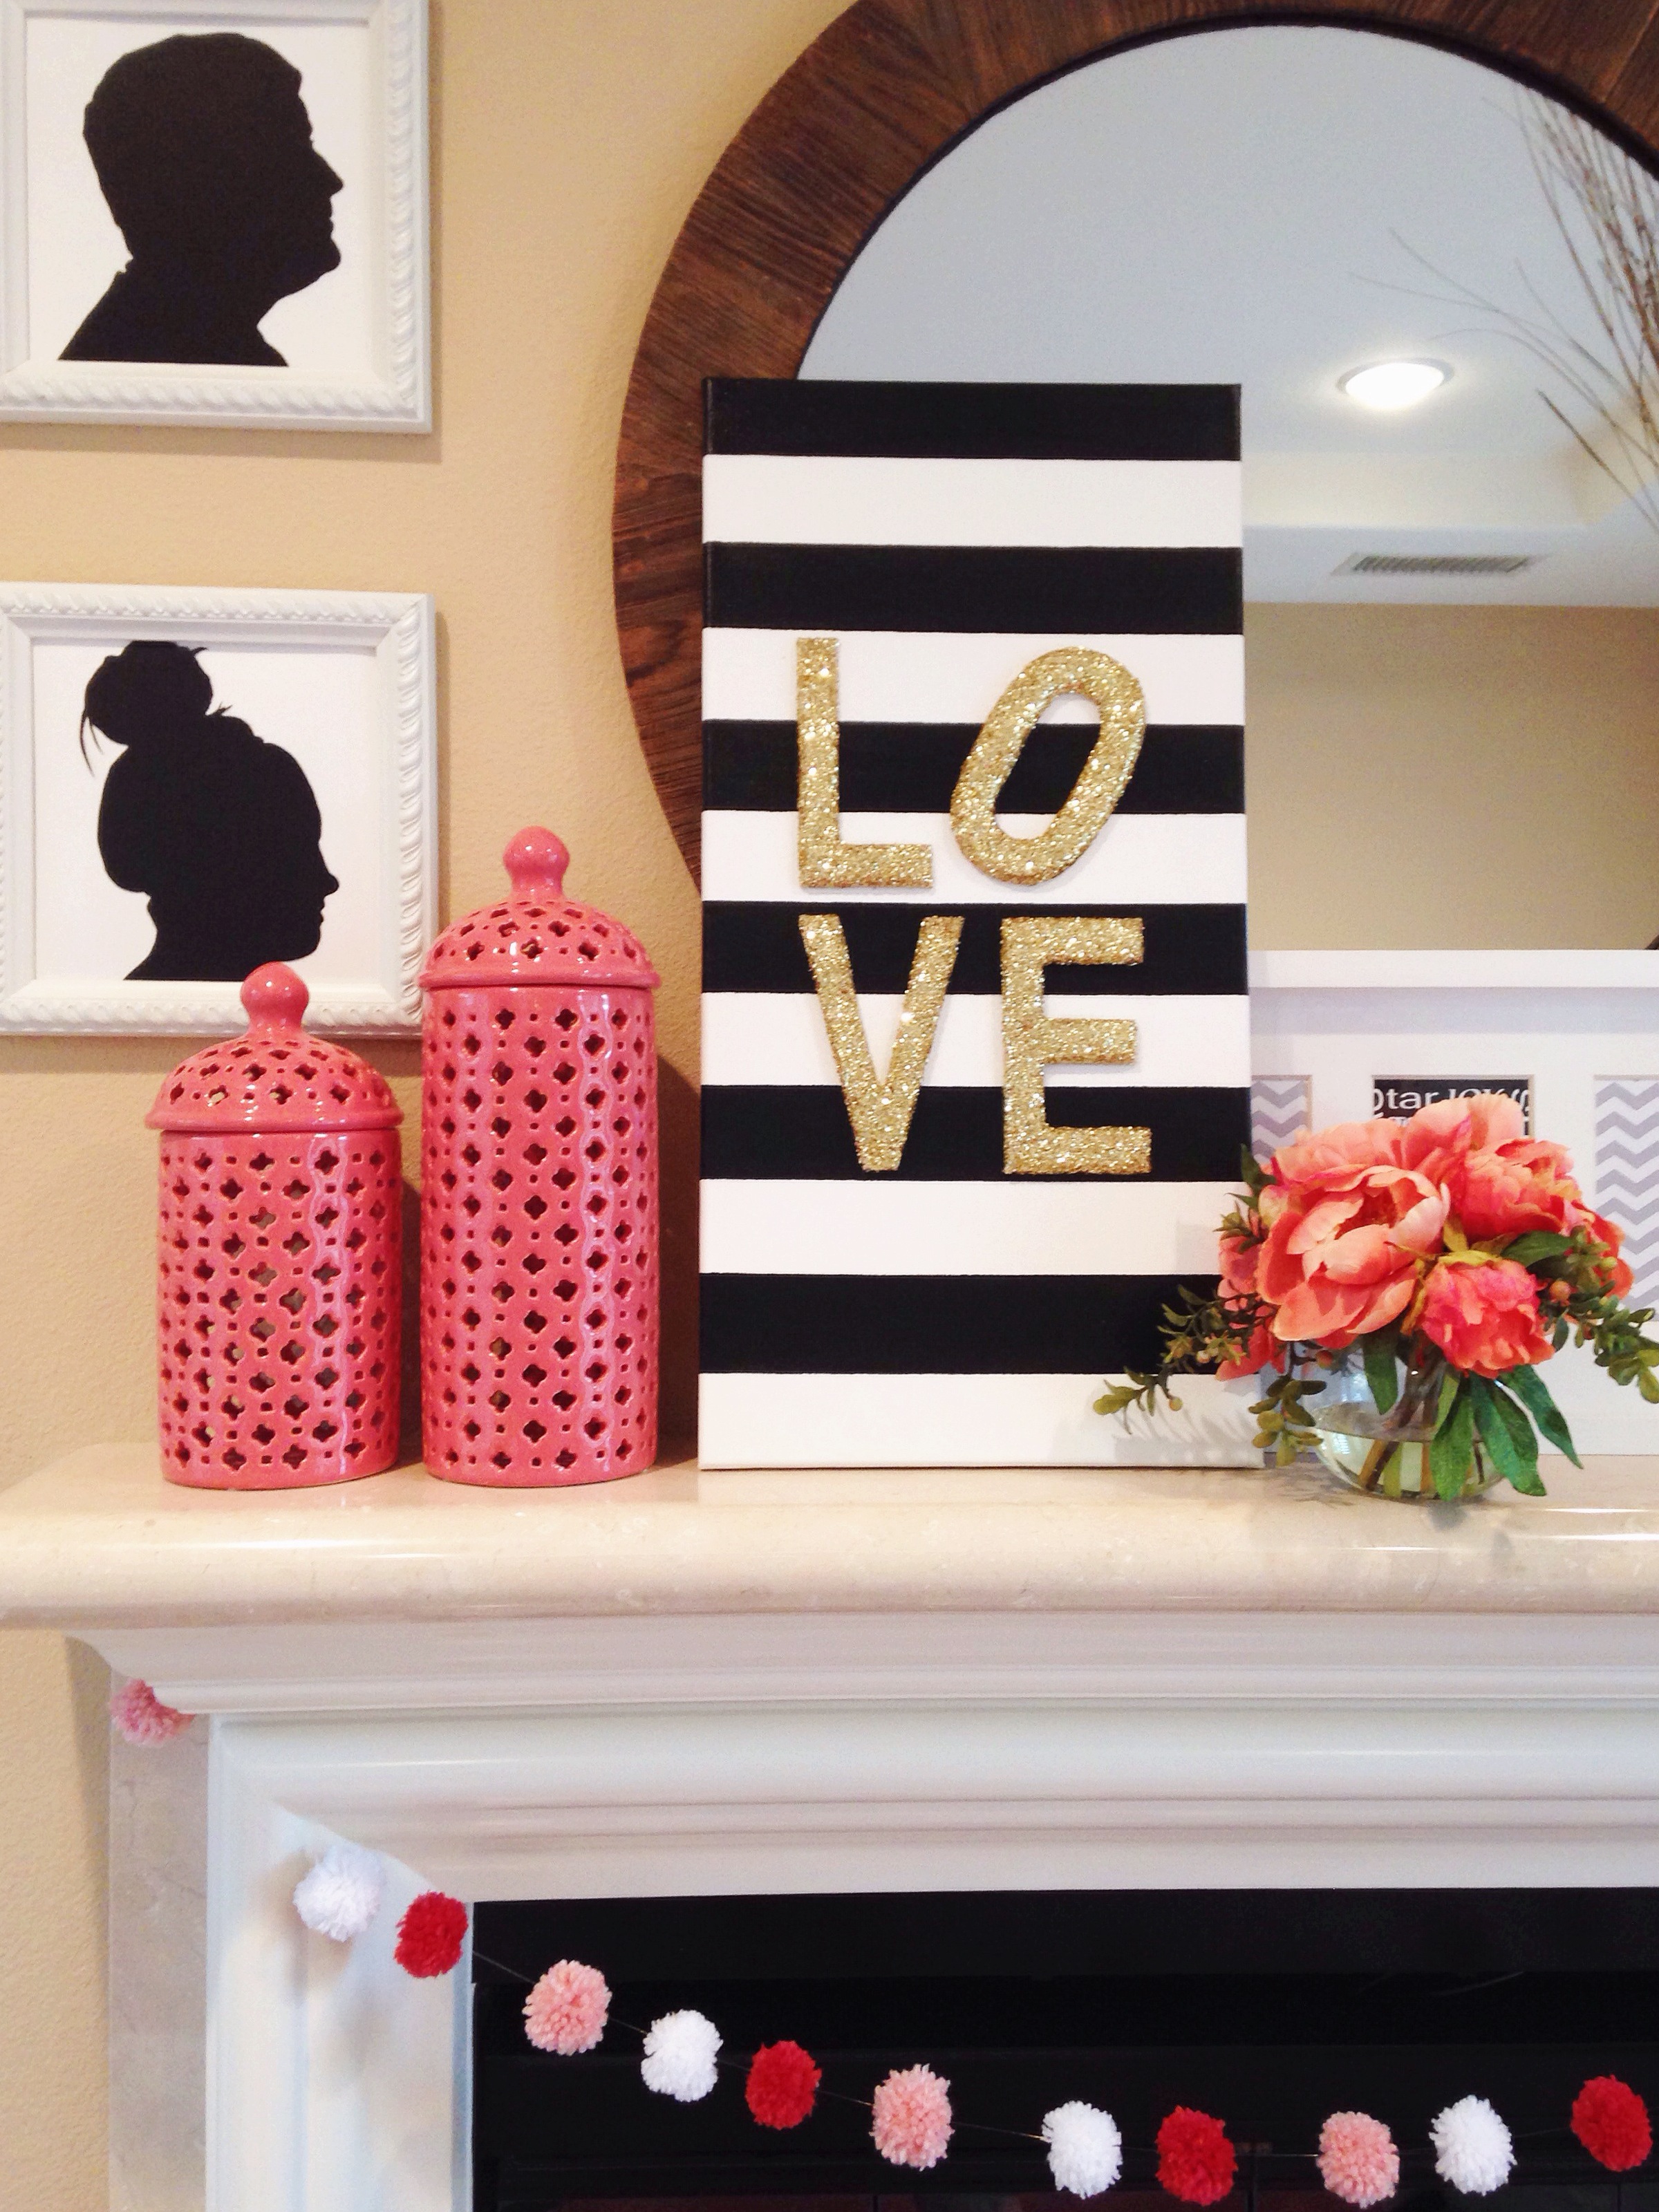
Easy peasy right? The deer head project was definitely more labor intensive….so this gave me the same look that I loved so much about the first one but was WAY easier. This would also totally be fun with red glitter for Valentine’s Day. I was also thinking of buying a wooden heart and doing that in red glitter and replacing just the “O” with that. Had I been thinking straight while at Michael’s I may have thought of that beforehand….next time!
And there you have it…a Valentine’s Day inspired project that is super simple and classy that can be displayed year round. Definitely give this one a try! Happy crafting!


You’re so creative! I love this
Hey there! I am a fellow Pearista & wanted to stop by & show some support. I started following your blog on Bloglovin’ to keep up with your fab posts! Love this DIY & may have to try it for myself!
Oh my gosh I love this!! I’m totally trying it
Hi, This is my first time here… Exploring your blog and I can’t stop! Love it and love your style! Keep posting!
This is so cute and I am going to the craft store to get my supplies. Could you tell me what size the wooden letters are? Thanks!!!
Hey! I love your crafts they are so cute. I was wondering where you got the slim wooden letters from? The only ones i can find are the big thick ones. Thanks!
I got them at Michael’s. They have a whole section at ours with all difference sized letters. Hope you can find some that work for you. Happy crafting!
Thank you for the instructions. I’m in love with this piece and I’m definitely making it now that I know how. I thunk its going to look fabulous in my livingroom
This is such a lovely art project! I’ve featured it in a round-up of heart shaped art projects for this years Valentine’s Day on my blog here if you’d like to take a look: http://www.ashleypicanco.com/5-diy-valentines-day-canvases/ Thanks for sharing your creativity!
This looks super awesome & super easy to make. Can’t wait to try this one!
Is there anything I can use instead of the ‘Coat enamel spray’ you used for the glittered alphabets?